


Camtasia is a popular application that can help you record your screen. The video can also be edited to some extent. In this article, we will share how to record your screen with Camtasia. We will take you through the step-by-step procedure. We will also share a better and easier alternative to it if you want to record high-quality videos and edit them like a professional.

Part 1. How to Record Your Screen with Camtasia- 2 Methods
Method 1 - Record Desktop Screen
You can record the desktop screen using Camtasia. After recording, you can also make changes to it and edit the video as you like. Screen recording with Camtasia is quite simple, and you can do it by following the given steps.
Step 1. Open Camtasia on your computer. You will see a window to create or open a project. Click on New Recording to record. If you want to create a new project, click on New Project.
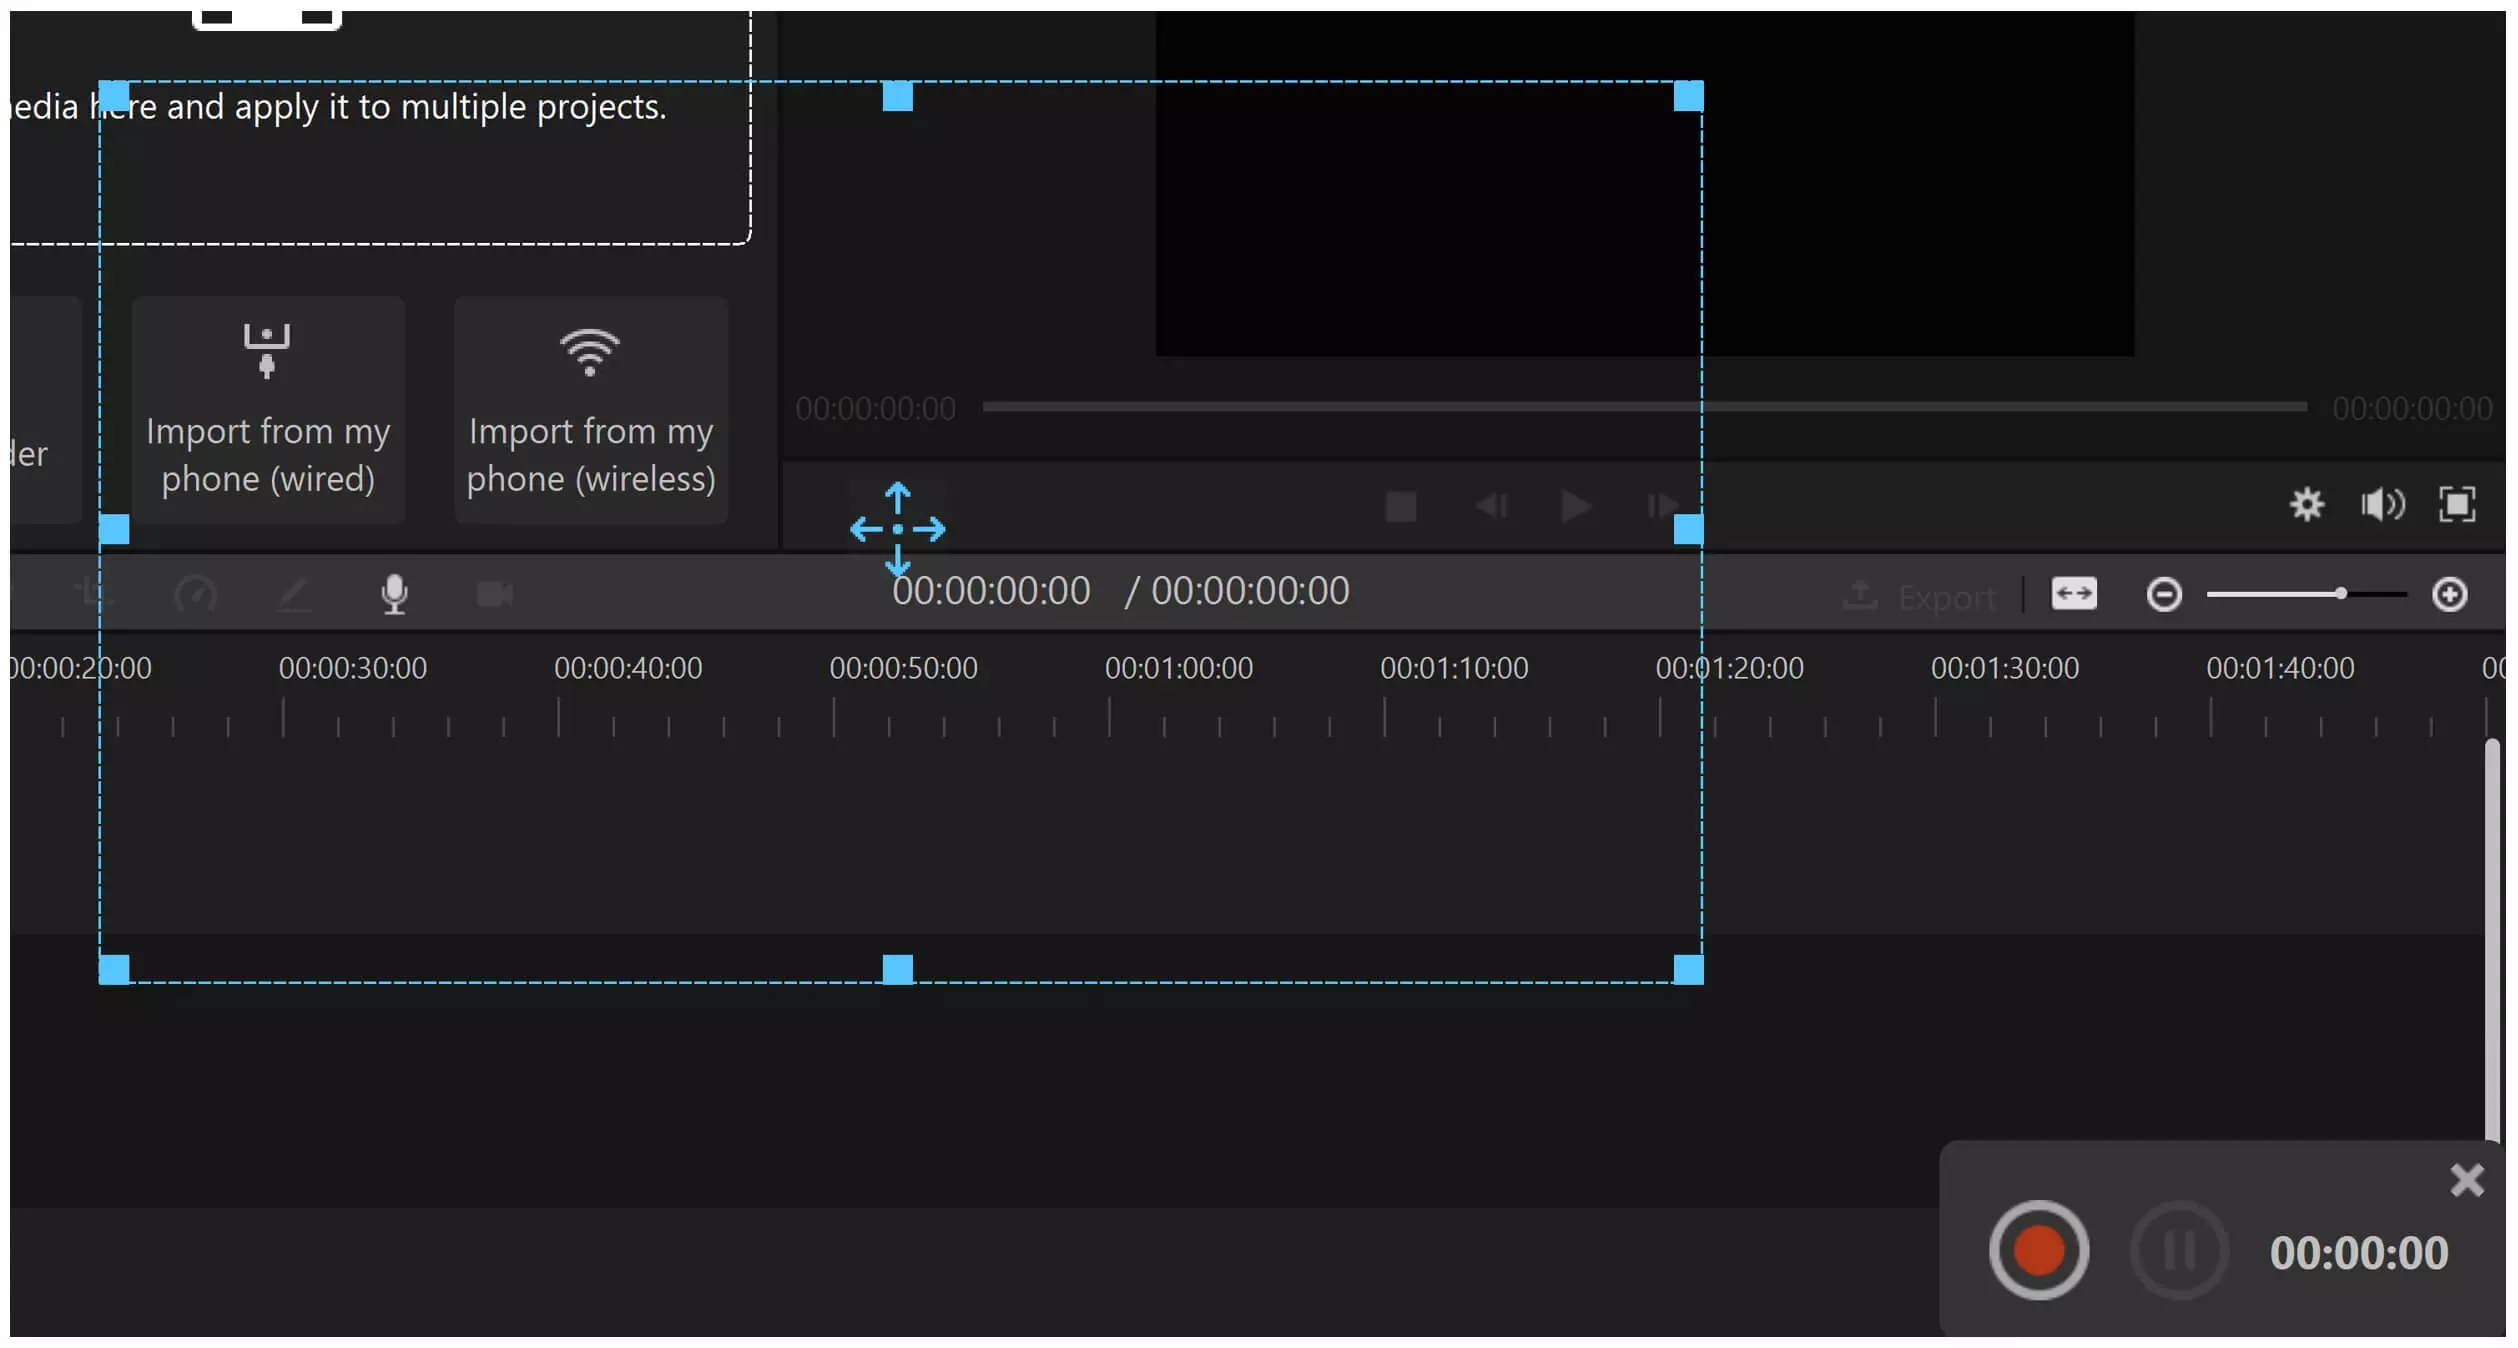
Step 2. If you have clicked on New Recording, you will have the recording window at the bottom right corner.
If you have clicked on New Project, you will be in the video editor. At the top left corner, you will see the Record button. Click on the button to start the procedure. Now, you will have the screen recording window at the bottom right corner. There will be a rectangle on the edges of the screen.
Step 3. You can start recording by clicking on the red button, but it is better to make other changes before you start recording. We need to adjust the size of the screen. You can adjust it by dragging the sides and ends of the rectangle. It will change the screen size, but it will keep the aspect ratio the same.

You will have the screen button on the toolbar. Click on the down arrowhead, and you will see the screen options. You can select the desired screen size. You can also select a particular area of your size by clicking on “Select area to record”. Moreover, there is also a Dimension box, so you can enter the dimensions you need.

The Camera option would be off to prevent webcam recording. You will see the Microphone option. You can turn it on or keep it off. You can also adjust its volume.
Step 4. Click on the “rec” button to start recording. Record the screen, and when you are done, click on the stop button.
Step 5. After recording, the video is directly imported to the Camtasia video editor. Here, you can edit the video and save it as a video file. On the right, you have a menu. You can add annotation, effects, transitions, audio effects, and anything you like.

Step 6. When you are ready, click on the Export button at the top right corner. Click on Local File. Select the video settings and click on Next. Select the file format and click on Next. You can select the size, video settings, audio settings, and other things. Click on Next. Now, you can add author copyright information in the video and then click on Next. Enter the name and select the location. Click on Finish.

Method 2 - Record Mobile Device Screen
You can record your mobile screen using the TechSmith Capture application on iOS. This application is also from the makers of Camtasia. It will help you record your mobile screen, and then you can use that recording and import it to Camtasia for further editing.
Step 1. Open TechSmith Capture on your iPhone. Tap on the red record button at the top left corner. It will ask you to turn your microphone on or off; you can select whatever you want. After that, it will start the recording.
Step 2. There will be a red bar at the top to stop recording. Tap on it and tap on Stop.
Step 3. Your recorded video will be in the media library, and you will see it on the home screen. Tap on the recording. It will start the preview. At the bottom left corner, tap on Share. It will give you Export To options. Tap on Camtasia.
Step 4. The camera will open up to read the QR code. If you are already connected to the device, you will see the device name. You can also tap on Connect New Device. It is time to connect the mobile to Camtasia on your computer. Open Camtasia and go to the File menu. Click on Connect Mobile Device. You will see a QR code on the screen that you need to scan through your mobile.

Step 5. After successfully connecting the device, the video will be shared. If your device is not connecting, make sure your computer and mobile are connected to the same Wi-Fi network. After importing the video, you can edit it and export it to the computer.
Part 2. Best Settings for Camtasia Screen Recorder
It is important to understand the best setting for the Camtasia screen recorder if you want high-quality videos. There are a few things that you need to keep in mind. Let’s have a look at them.
Screen Size
The size of the screen is the most important thing that you need to consider. Camtasia allows you to select the desired screen size. The easiest way to set the screen size is by clicking on the down arrowhead of the Screen button on the Camtasia toolbar. Then, you can select the desired size according to the aspect ratio.
If you think the required size is not available, select the desired aspect ratio. Now, move the ends of the recording rectangle. It will help you select the desired area without disturbing the aspect ratio if the dimensions are locked. You will see a lock at the dimension. You can unlock it if you don’t need to follow any aspect ratio and want to select the desired area.
Another option is entering the values in the boxes given in the dimension. Enter the values you think are suitable.
Microphone
You can also record your own voice using the microphone. You can turn it off if you don’t want to record the sound while recording the screen. Click on the down arrowhead and click on “Do not record microphone”. If the microphone is on, you can select the volume level. It will set the maximum volume, and the sound will never go above this limit.
Lock the Screen
It is a good practice to lock the screen before you start, but it will only work if you want to record the whole screen. If you have selected a custom size, everything will be disturbed after locking the screen. Click on the Capture button and click on “Lock to Screen”. It will lock the screen, and you cannot move it or resize it during the recording.
Webcam
You need to keep the camera off while recording the video.
Also Read:
10 Best Online Screen Recorders >>
Part 3. Record Your Screen with an Easier Tool - iMyFone Filme
Filme is a user-friendly video editing tool. You can easily record your screen with it, and the videos can be edited easily. Since it is a video editor, it has basic and advanced video editing tools to make everything perfect. In Camtasia, the tools are limited, and you might need to edit your videos in any other tool, so a better option is Filme where you can do everything you want.
- Filme is an all-in-one video editing tool that can also record your screen. After the recording, you can make edits to the video and do whatever you like.
- There are tools for cropping, splitting, resizing, color adjustment, rotation, voice recording, etc. It has all the basic and advanced tools. You can use any of these tools to create a perfect video.
- You can add effects, stickers, transitions, GIFs, text, and images to your videos. Filme also supports multiple soundtracks, videos, and images in the timeline at the same instant.
- The final video can be exported in the desired format. You can choose resolution, bitrate, framerate, codec, file format, audio settings, and a lot more. You can create videos for any platform.
Features:
How to Record Your Screen Using Filme
Step 1. Open Filme on your computer. Go to File>New Project and click on the aspect ratio you want for the video.
Step 2. Above the timeline, there is a toolbar. You will see a camera icon, which is for screen recording. Click on the icon, and there will be a rectangle on the screen. You can position the rectangle and adjust its size.

Step 3. At the bottom right corner, you will have the play and stop button. Start the recording by clicking on the red circle. Record the screen, and when you are done, you can stop recording by clicking on the stop button.
Step 4. After recording, the video will appear in the Project Media. Drag this video to the timeline. You can also trim the video by dragging its ends in the timeline.
Step 5. Now, you can add effects, stickers, text, or anything you want in the video. You have all the menus at the top. If you want to add text, move the playhead to the place you want to add text and click on the Text menu. Select the desired text style and edit the text. Similarly, you can make other changes. If you want to add music, import the file and then drag it to the timeline.

Step 6. Go to the Export menu and click on Export Video. It will open the Export window. You need to enter the name and location. Click on Settings to adjust the resolution, frame rate, bitrate, encoder, and audio settings. Finally, click on Export.
Final Words
Camtasia is an excellent application that can help you record your computer screen. It is created to record the screen, and it offers better options. You can control the screen size, video quality, sound, and everything. Moreover, you can also edit the recorded video later. However, there are limited tools in Camtasia. Therefore, we recommend Filme as it is an excellent tool for recording the screen and editing the video. It is an all-in-one video editor, which is perfect for beginners.


