Looking for the ways to use android's built-in screen recording features on Google pixel? Well, lucky you then because I know exactly what to do to use this feature.
Android 11 has new features that allow you to screen record anything you want, anytime, and anywhere. Google pixel phones were not known to have this built-in feature before. They had to use the third-party apps for this function but after android 11, everything changed. This feature is really helpful if you are a YouTuber, tiktoker or even a Vlogger. All you have to do to use this feature is to drag the notification panel downwards and click on the screen recorder icon already present in the quick access tool bar. There you go! Your screen recording has started.
How to Use Android's Built-in Screen Recording Feature on Google Pixel
As I have already said, android 11 has recently launched a new built-in feature that allows a user to record screen for however long they want. This feature was also present in the android 10 but users have complained that it doesn't work efficiently and sometimes record half of the screen. This feature has now been advanced in android 11.
If you want to use screen recorder, make sure that you have the said version of android that launched in the early days of January.
How to Record Your Screen:
Recording your screen on Android is not that hard, actually it is quite easy. All you have to do is follow the following steps that I have given and then boom! You have your screen recording knowledge on your fingertips. You don't have to want tutorials or anything else to further know or remove your doubts. I will show you the steps in which you screen record Google pixe. These will be the easiest steps you can find anywhere for your pixel screen record.
They are as followed:
Step 1: Swipe down Twice:
The first and the main thing that you need to do is to turn your phone on, swipe the top of your screen two times. This will take you from notification panel to the quick access toolbar panel.
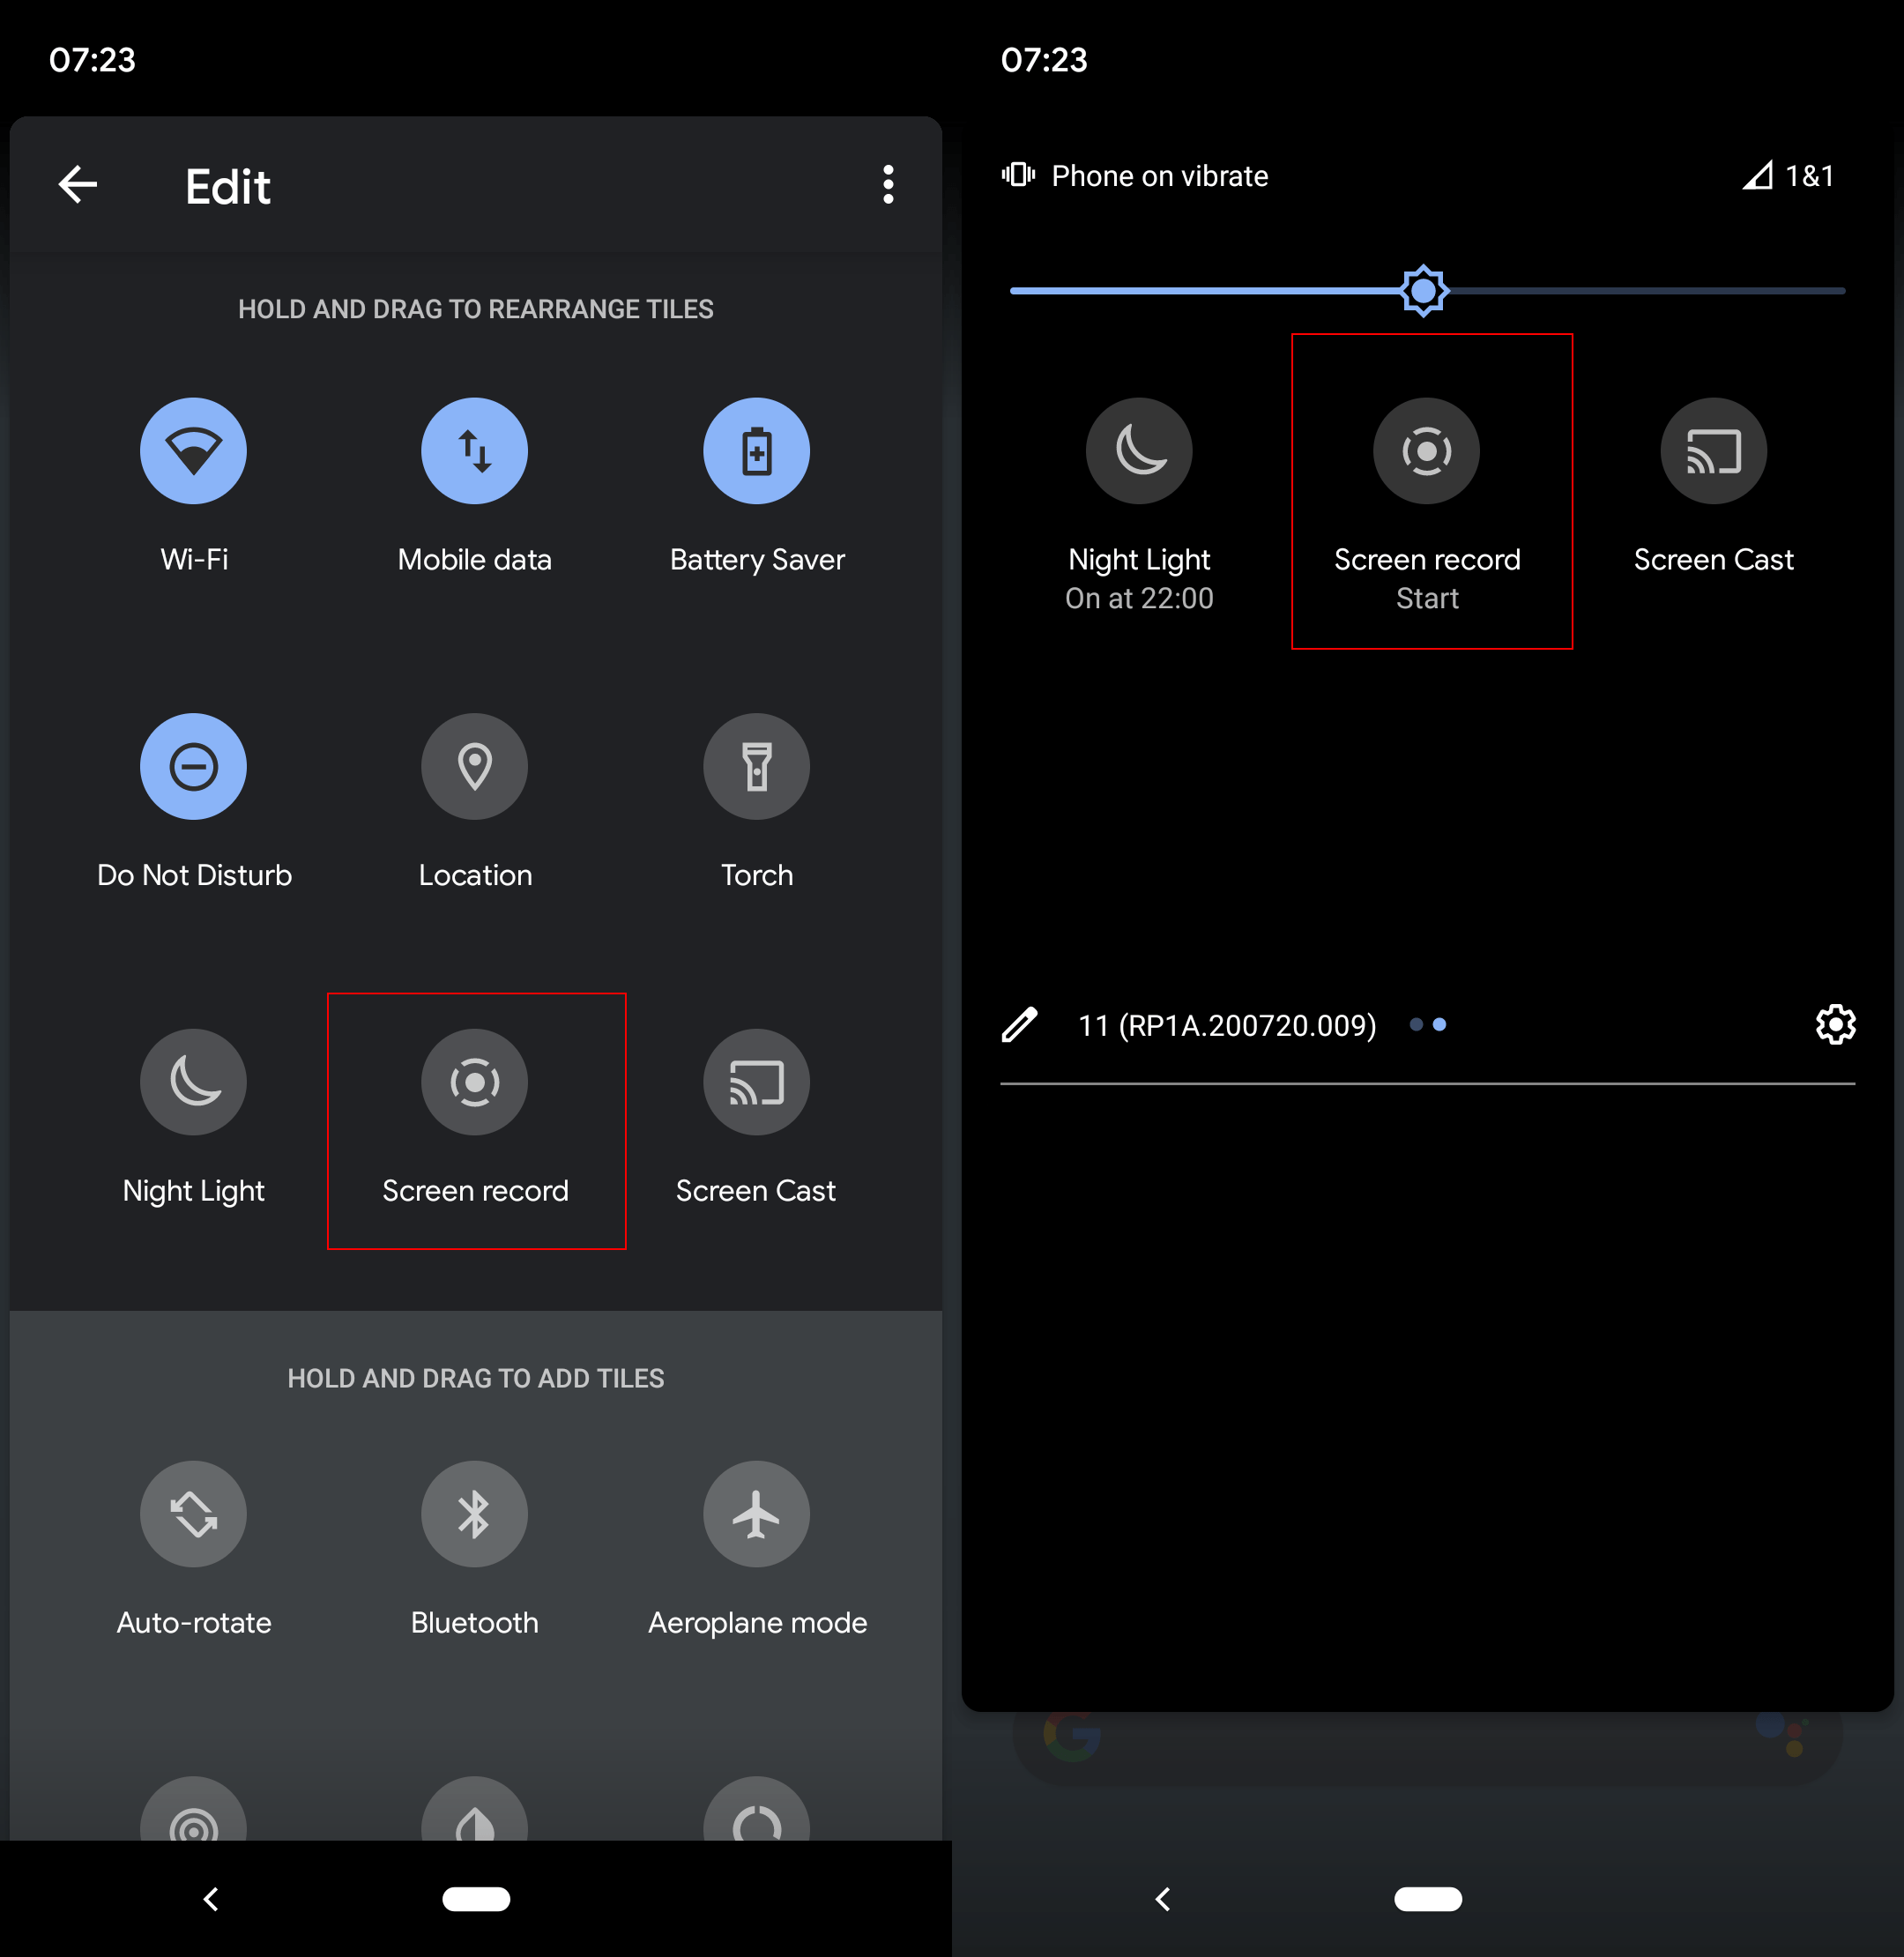
Step 2: Click Screen Recorder:
When you have swiped the screen down twice, there will be an icon somewhere hidden there. This icon is named as 'screen recording'. You might have to swipe right to find the screen recorder but usually it is present on the first slid. The icon is of a video tape recorder. You can easily recognize screen recorder by its icon, you don't even need to search up its name. Click on the screen recorder to enable recording.
Step 3: Select the Version of Recording:
When you click on the screen recorder, there an option plate pops up. It gives a user two options;
Select a silent screen recorder: if you select this option, your video screen recording will be void of any sound be it of the video or background.
Select the sound screen recorder: if you select this option, your video will start recording with voices of the video as well as the background voices.
Step 4: Stop the Recording:
To stop the recording, you need to again go to the quick access toolbar panel by swiping down twice. From there, click on the screen recorder again to stop the recording.You can find the pixel screen record in your gallery easily.
These were all the steps that you needed to know about the pixel screen record and pixel screen recorder. There is also screen record pixel 3, if you are looking for any other features. Google pixel screen record has become really easy now with the help of this feature.
10 Super-Useful Pixel Features Google Doesn't Really Tell You About
In this article, I will tell you the most useful 10 pixel features that Google doesn't tell you.
1. Swipe your home-screen down to open notification panel:
This trick is really useful especially when the phone as getting bigger with time. I have personally done this thing without knowing and never paid it much attention. But now that I think about it, not many people know about this feature of pixel.When you can't reach the top of your screen, just swipe the home-screen downwards and there you go! Your notification panel is right before your eyes.
2. Make custom theme:
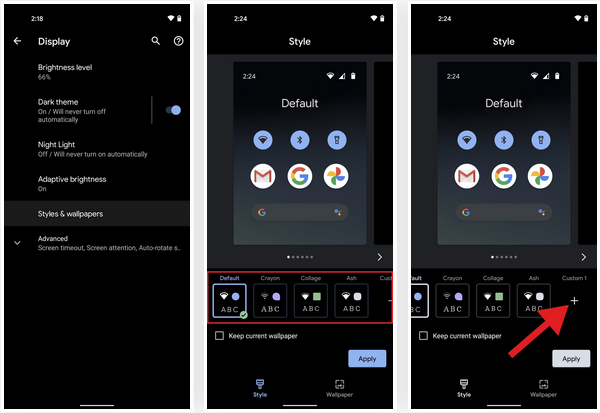
You can easily make your own custom theme in pixel. All you need to do is go to the 'setting' from there go to the 'style and wallpapers' and click here. When you do so, there will appear a carouse containing themes already made, but there is also a '+' option present at the bottom of the page. You can click on this option if you want to make your own theme. From there, you can do anything you want. You can change the font, panel bars, icons, and background, anything that comes in your mind. But this also effects the applications in your pixel.
3. Google lens:
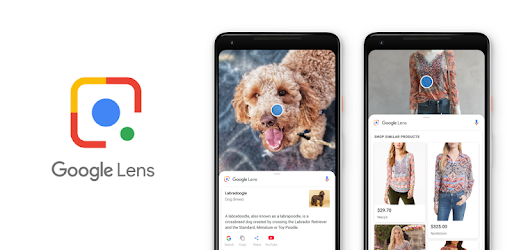
Google lens is one of the best built-in features of pixel you never know. They are just a click away, but we mostly don't know because no one ever told us about it. It is a really useful feature. You can easily find it in your camera. Just press the power button twice and the Google lens will open. You can copy the text in front of you in physical form, into your lens and email it wherever you want. You can also copy the business card of a colleague and save it for later use.
Users can also download the Google lens from PlayStore but pixel users do not need to do that as it is already present in the phone.
4. Captions of videos with live transcribe:
This feature is honestly the best one present in the pixel. But it has been disabled by default because it uses a lot of battery. You can easily enable it from settings for use and after use, again turn it off. The reason why it is turned off by default is because it continuously checks for voices if forgotten to turn off. To use this feature, press one of the volume buttons and when the volume panel appears, click on the rectangular box present at the bottom. This can be turned off the same way.
5. Pause apps to ward off distraction:
Getting disturbed by the amount of an app you use and don't have time for work? Well, we can help you then. All you need to do is press on the particular icon for longer than necessary. There will be an hourglass popup there. Click on that and hit pause. From then on, you won't be getting any notifications for the rest of the day and the icon will have a shadow looming over it. This really helps you to concentrate on your work.
6. Fingerprint access to notifications:
Pixel also allows you to have access to your notification just by the simple touch of your finger. All you need to do is go to the setting and add access of your fingerprint for notifications. It is a really simple task to do! Most people have done this, but didn't pay enough attention.
7. Saved password from Google sync automatically:
We all must have experienced this that we save a password on Google, and when we again use that email, we can easily use the previously saved password. This is a really helpful feature of pixel.
8. Quick access to camera:
You can have the quick access to your camera by simply just having the setting of double pressing the power button. We mostly experience some moments where we don't have time to put password and then open camera on our phones. Pixel has helped us with this problem as well. Now you can have the quickest access to your camera without even wasting a moment.
9. To take pictures:
Now in pixel, you can easily take pictures without clicking the capture option. All you have to do is press any of the volume buttons and there you go! You picture has been taken.
10. Snooze notifications to see them later:
Pixel has a lot of features unknown to most people. One of the best features is that it allows a user to snooze notifications to see them later. You can activate this feature from the settings. When you swipe the notification to the side, a letter 'Z' appears. By clicking this, it allows the notification to appear again after an hour or so. In this way you can deal with them after you get free.
Best Alternative: All-in-One Screen Recorder & Video Editor on Desktop
iMyFone Filme
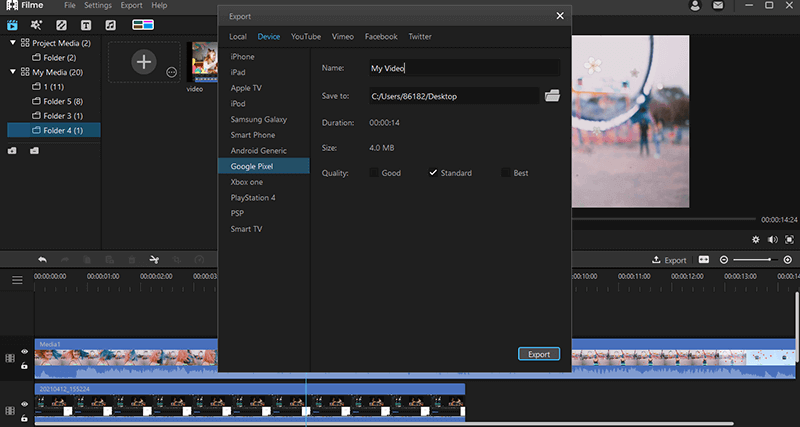
The best alternative of pixel screen recorder is iMyFone Filme. iMyFone Filme allows user to edit, create, add font, etc. of their video. It also allows users to screen record. iMyFone Filme is honestly the best editing software you can find anywhere. It allows a user to make videos, slideshow videos, editing, and many more. Butthe main feature we are going to talk about is screen recording.
Advantages:
-
iMyFone Filme allows a user to add audio to their videos. Users can select from the pre-present audios in Filme or add their own.
-
You can also add effects to make your video fun to watch.
-
Everyone wants to add filters. Keeping this in mind, Filme also made filters for the users.
-
You can also transition your videos.
Features:
-
iMyFone Filme allows a user to use multiple editing modes.
-
It also allows a user to make fast videos by using the fast video mode.
-
It allows a user to quickly make slideshows.
-
Filme allows a user to screen record their work and share it as well if they want.
It is really easy to use software. Anyone, from YouTuber to generation Z, can use this without even having much experience. That is why it is generation Z's cup of tea.
How to Record Your Screen using iMyFone Filme:
Want to know how to screen record on pixel 3 using iMyFone Filme? Or how to screen record on Google pixel 3! Here are the steps you need to know to screen record using iMyFone Filme:
Step 1: Record Your Video with 3 Clicks:
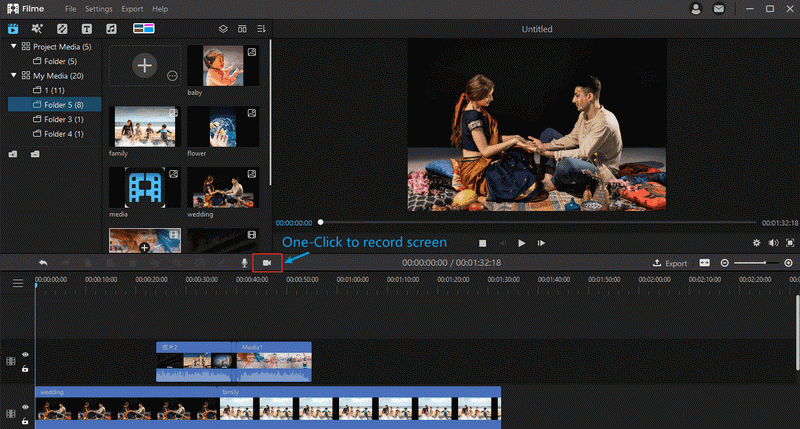
First of all open this screen recorder in your computer. There will be an icon of audio and video. Click on them and your video will start recording. For pausing, again click on the screen recording icon.
Step 2: Get the Video in Your Media Library at Once:
After you have done that, the video will automatically save in your internal media library. It is honestly the best feature of Filme.
Step 3: Cut the Videos, add filters and add music and text:
You can cut the videos however you want or add filters, texts, styles, music, and whatever you want, wherever you want. You can also add transitions in your screen recorded video.
Step 4: Export and Share:
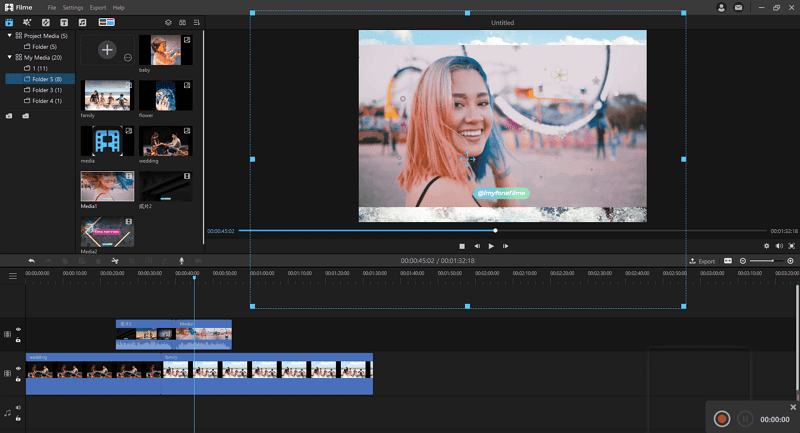
After everything is done, and you are satisfied with your work, you can save the video. While saving, another option comes. It is of share! You can share your masterpiece with whoever you want.
In this article, everything about Google Pixel and how to record screen using it is given in detail! The best alternative is also explained! I hope this will be good enough for you to help you in your queries!
