Do you want to get rid of watermarks from your videos in an effortless way? If yes, then this article is going to solve your problem. We are going to share two easy methods for removing watermarks from images and videos. You will get to know the best method on how to remove watermarks from video using Final Cut Pro. Let's start.
If you're just starting out and have no idea where to start or Final Cut PRO seems like a tricky software to remove logos or watermark from a video? Don't worry because there's another easy alternative available, which gives you the freedom to get your job done without needing any technical knowledge, and one such popular software is iMyFone MarkGo.
Part 1. How to Remove Watermark from Final Cut Pro
Final Cut Pro is a professional video editing software. It can do various jobs for making the video entirely different from the original one. You can use it to combine video clips, enhance video quality, change video speed, size, and color, and make your videos up to the mark. It is very effective in adding texts, pictures, signatures, and logos to your images and videos.
We can also use Final Cut Pro to erase and add watermarks. Let's have a look at an example in which we will teach you to cut watermarks and objects from videos.
Final Pro Cut Step-by-step Guide:
Step 1: First of all, download and install the software (Final Cut Pro) on your device. This software is only for macOS users.
Step 2: Before going ahead with Final Cut Pro, you need to be familiar with Splice X plugin. This plugin is necessary to make your work easier and save you time.

Step 3: Once you have installed the plugin, you can pursue the next steps. At this point, select a video from the device and import it to Final Cut Pro. Make sure the part of the video from where you want to cut the watermark or object should be still and clear.
Step 4: Move your selected video to the timeline and go to the part where the watermark is present. You can also select the whole video to delete signs throughout the video.
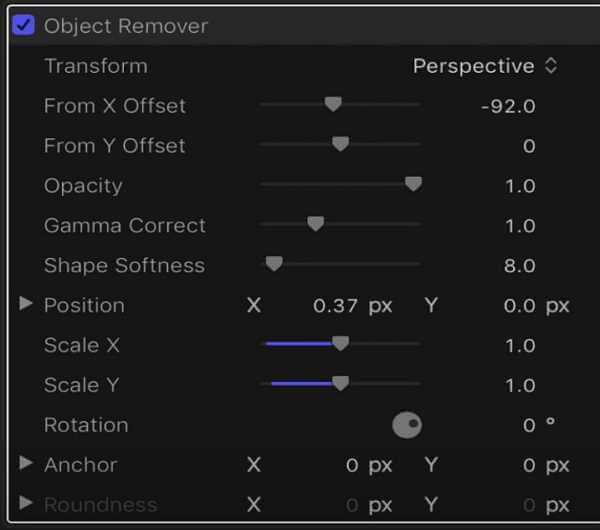
Step 5: After selecting the part, go to the Effect browser and scroll down to click on C2 Slice X. You will see different effects, click on the Object Remover and then drag and drop it to the timeline. The plugin will show you a green box to select the desired part from the screen.
Step 6: Now, create a boundary around the watermark or object which you want to remove. Drag and drop the green box into the created boundary. This green part will duplicate the background and replace the object with it.
Step 7: Now, you have to slide the green part to the area which you want to be replaced with an object or watermark. For this, again go to Object Remover and slide the green parts through From X Offset or From Y Offset.

Step 8: The plugin will replace the object or watermark with the selected area. After that, simply save or download the clip to your desired place.
Also Read:
Add Video Transitions in Final Cut Pro >>
Add Sound Effect in Final Cut Pro >>
Part 2: Easier Way to Get Rid of Watermark - iMyFone MarkGo
iMyFone MarkGo is software that is used to get rid of or add different signatures, logos, watermarks, and texts from any videos as well as from images.
It is compatible with Windows and Mac and is the perfect software for beginners and professionals.

Features of iMyFone MarkGo:
1: Works for videos and images
iMyFone MarkGo is one of the best applications to remove watermarks from your files. It supports both video and image formats.
2: Free of cost
The most exciting thing about this watermark remover is that it is free to use.
3: Addition of watermarks
iMyFone MarkGo is not used to remove different logos from videos and background from images, but anyone can also create his/her watermark and add it through this software.
4: Easy to use
The software is very easy to use because of its simple interface and straightforward steps.
5: Compatible with Windows and Mac
If you are a Windows user, you will be happy to know that it works perfectly well on Windows and Mac.
iMyFone MarkGo Guide:
Watch the video tutorial to learn more about MarkGo
Step 1: Take an image from Dreamstime and download the iMyFone MarkGo on your computer.
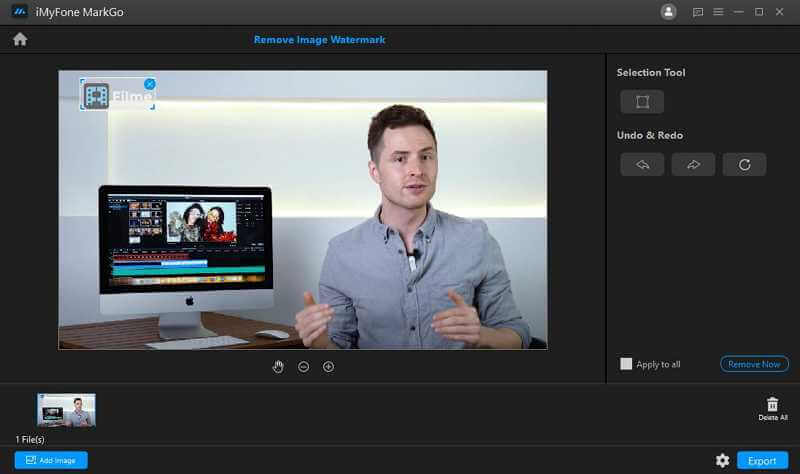
Step 2: Open the software and click on the Remove image Watermark. Then import the images from your computer that need to get the watermarks removed.
Step 3: After you have imported the images, you can click on the selection tool which help you to select the watermark part. And then a box will pop up which you can drag and drop on the watermark.

Step 4: Once you select the part of the picture which you want to remove, click on the Remove Now button at the right to preview the result.
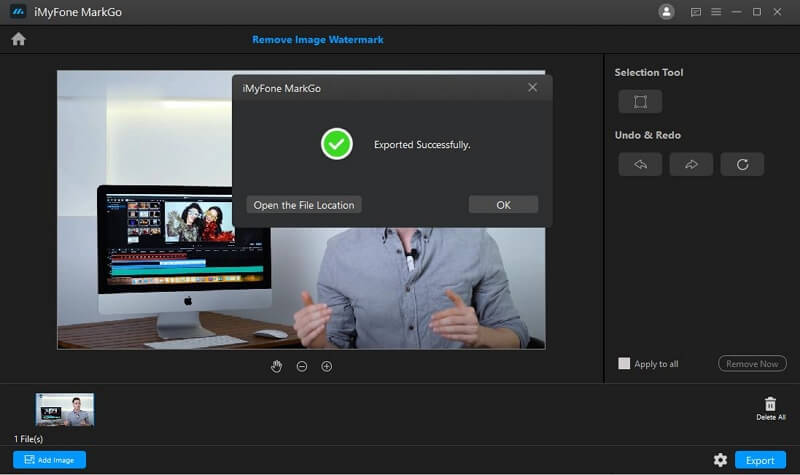
Step 5: If you are happy with the removing result, click on the Export button and you will get the high quality exported image successfully.

Comparison between Final Cut Pro and iMyFone MarkGo
| Features | Final Cut Pro | iMyFone MarkGo |
|---|---|---|
| Price | It has a free trial of 90 days. It demands $299.99 for a lifetime license. | Free of cost. You can download it for watermark removing. But the exporting feature is limited to paid users. |
| Interface | It requires a learning curve for beginners. | Very simple interface. |
| Compatibility | Available only for Mac users because it is compatible with macOS. | Available for Windowsand Mac users. |
| Ease of use | Very difficult for beginners. | Super easy to use. |
Final Words
It is essential to clear watermarks from your videos and pictures before using them for any professional purpose. You can remove watermarks and add your own sign or watermark to the images and videos. We have shared the best methods to remove these kinds of signs from your content. There are both paid and free versions of methods in this article; you can go with whatever suits you.
But if you want an easy-to-use watermark remover, choose iMyFone MarkGo which can 1 click to remove watermark this easy.


