Rendering makes a preview/output of your video by processing the information. In video editing, when you render a video, it means you are processing the edits you have made to have a look at the final output. We use rendering to reduce our playback lags, usually caused by applying any effect or transition in a video. It provides your video with a smoother playback quality.
On the other hand, replacing a video, sequence, or footage is a straightforward and standard editing tool that we use in our work. You replace your file within a few clicks. This feature saves your video from messing up. Replacing can save your time and save you from making the whole video again. In this article, we will discuss how to render and replace your video in Premiere Pro. We will have a look at the steps that you need to follow.
Part 1. How to Render Video in Premiere Pro
Rendering is beneficial for your videos because it can reduce playback lag. Due to the high requirements of Premiere Pro, sometimes your video may cause lag. Premiere Pro requires a high GPU to run things smoothly. If you face lag issues while previewing your video, then rendering will help you a lot.
You can render your video within a few steps, and it takes a few minutes (depending on the duration of the video and other things) to process the information. You can render your video by following the steps below.
Step 1: Download and install Premiere Pro from the link. Open it, and there are two ways to create a new project. When you open it, you will see an interface to create a new project. Click on New Project to move on to the Editing panel.

You can also create a new project by going on File > New > Project, or you can also press Ctrl + Alt +N.
Step 2: Now, you have to import media from the media section at the bottom left. Click on Import Media to Start and select your desired media. After selection, drag and drop your media to the timeline to begin editing.
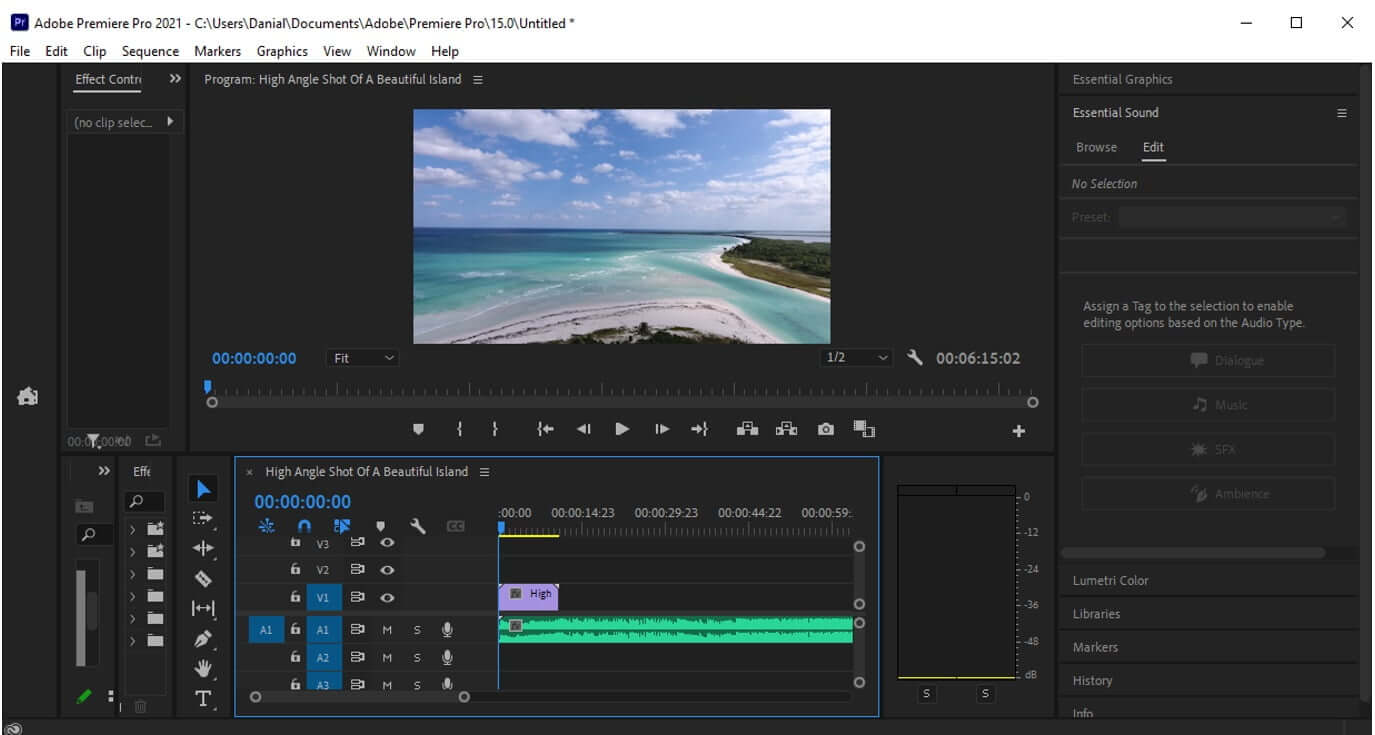
Step 3: First, you have to select the work area that you want to render. To render your work area, place the playhead at the start and press "I". Now, place the playhead at the end and press "O "to select the work area.
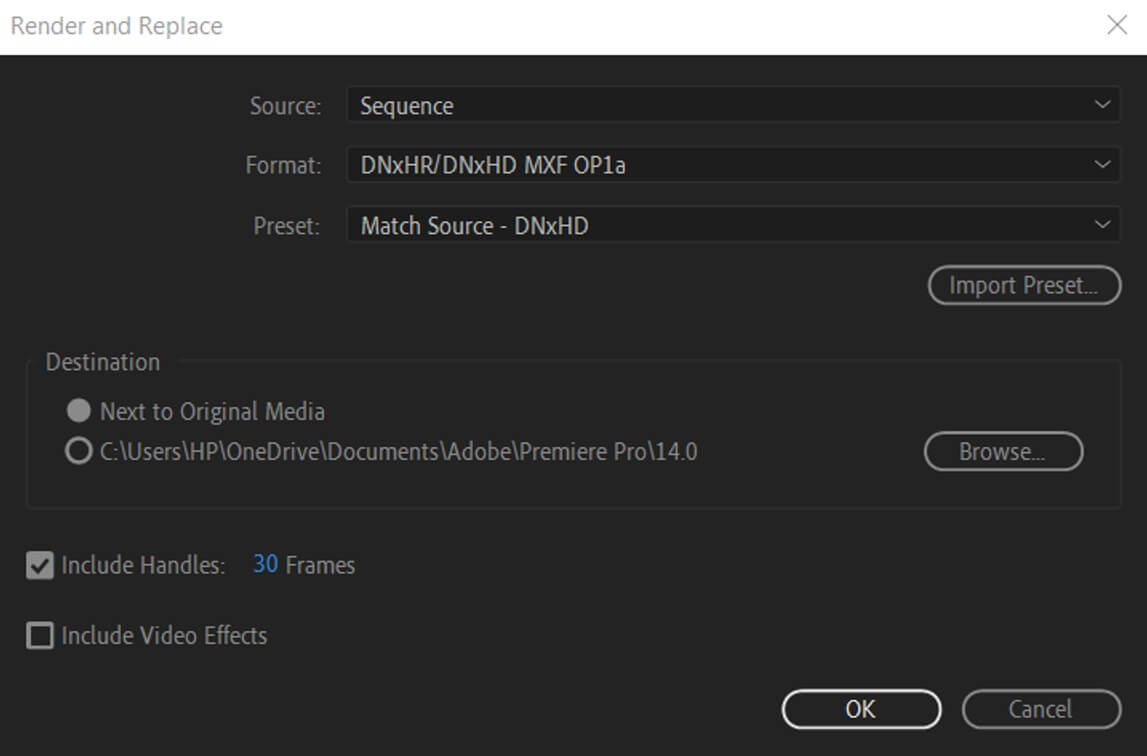
Step 4: After selecting the clip, right-click on the clip and select Render and Replace; a window will appear where you will have a few options to set the Source, Format, Preset, and Frame. Select the settings which you like for the video.
It also has an option of Destination to save your file at the desired location, but you should choose Next to original media for a better experience because saving your rendered file next to your original media will give you a better result. Click on OK to proceed.
After rendering, it will show a yellow bar above the rendered clip on the timeline.
If you have mistakenly rendered a wrong clip and want to replace it with the original one, then you can do it within a second. Right-click on the clip, a list of menus will appear; click on Restore Unrendered.
Step 5: Now export your media by going on File > Export > Media. Select your desired location where you want to export it.
Part 2. How to Replace Footage in Premiere Pro
Replacing footage is straightforward, and beginners also do that without any hassle. If you accidentally placed a wrong video in Premiere Pro, you can replace it with your selected one.
Somehow, you accidentally entered the wrong video and edited it entirely by adding effects, transitions, voiceover, and many other things. You can replace that clip with your selected picture, and when you replace it, the previous editing will apply to the new footage by the feature of Premiere Pro.
Replacing footage in Premiere Pro is very easy. You can replace your clip in a few seconds by following the steps below.
Step 1: Right-click on your clip and click on Reveal In Project. You need to do this to get your video in the project.
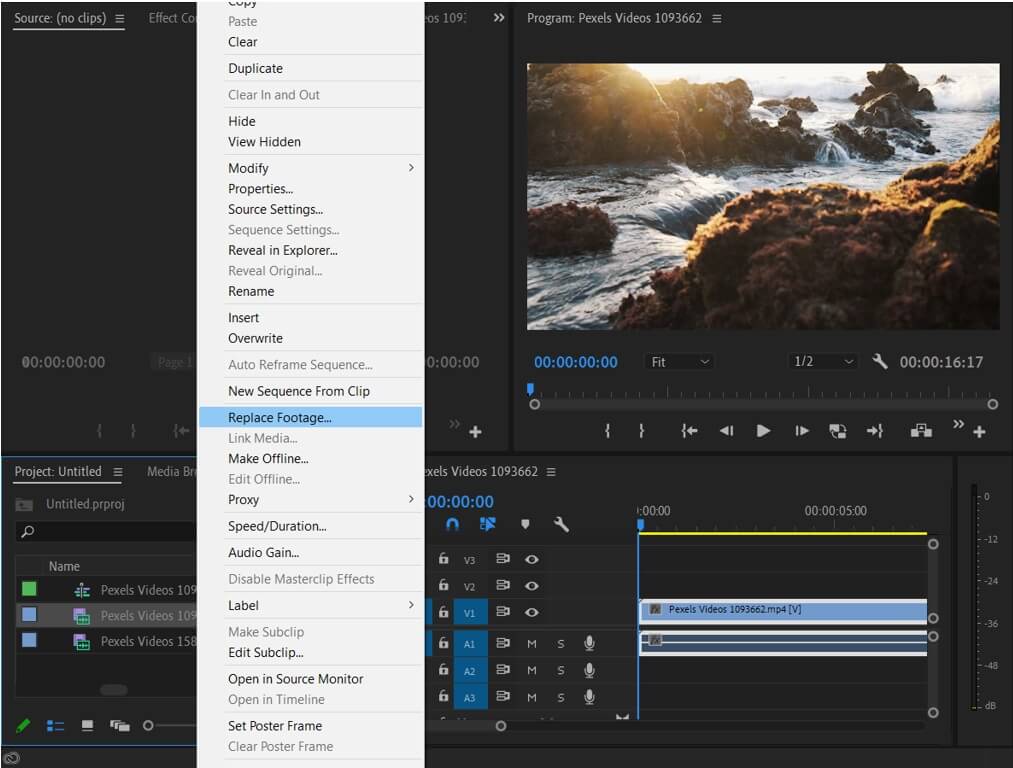
Step 2: Right-click on the clip which you want to replace; click on Replace footage and select your desired clip. Click on Select to replace your footage with your desired one.
You can also replace the footage by holding ALT and dragging the footage onto the footage which you want to replace.
Part 3. Best Alternative Video Editor to Render Video - iMyFone Filme
We have discussed how to render in Premiere Pro to make your video preview quality smooth. We have to render a video in Premiere Pro manually, while in iMyFone Filme, there is no need to do that.
iMyFone Filme automatically renders a video, and you will always get a high playback quality. You will never face any lag issues in iMyFone Filme because it does not require a high-end PC.
We would recommend you Filme because it is a user-friendly editing software for your videos. You can edit your videos quickly, and it will always display a smooth playback quality that Premiere Pro will not give.
Premiere Pro is slightly difficult to use, and you may get stuck between editing your video because of any technical issues. On the other hand, iMyFone Filme is the best alternative to use because of its simplification. You can add as many effects as you want; it will never show you any playback lag in previewing the video.
Step By Step Guide with Filme
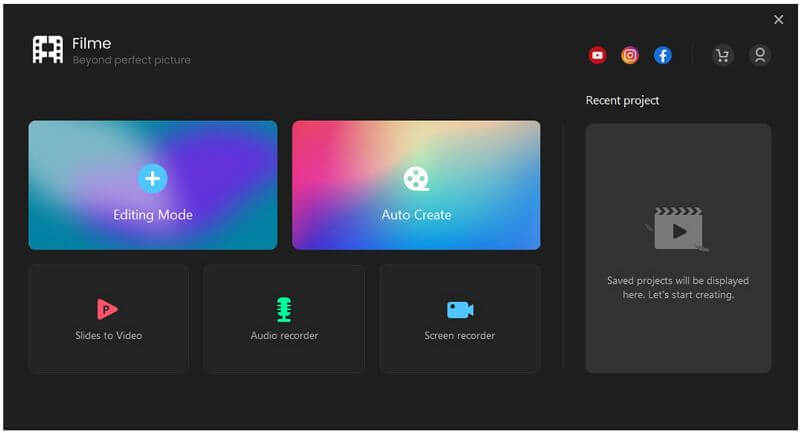
Step 1: Download and install iMyFone Filme on your computer. You will see an exciting interface having a few options. Click on Editing Mode to start editing the video.
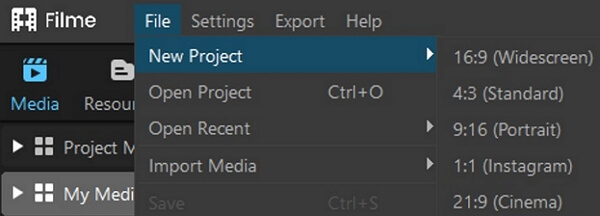
Step 2: First, you have to create a new project and select the aspect ratio according to your video. Click on File > New Project and select the desired aspect ratio. You can also create a new project by using a shortcut Ctrl + N.
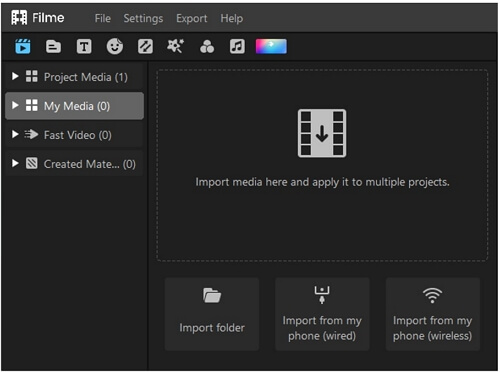
Step 3: Now, you have to import your media files in iMyFone Filme with a few clicks. Click on Import Media, select the file location from where you want to import and click Open. After importing, drag your clips to the timeline for further editing. You can also click on + to bring your videos to the timeline.
Step 4: In this step, you can do whatever makes your video more appealing. iMyFone Filme has many editing tools to make your video more pleasant. You can add effects, filters, transitions, stickers, audios, and texts to your video because iMyFone Filme has a wide range for each collection. iMyFone Filme has 110+ transitions and 80+ filters that can make your video more engaging.
You can add any editing tool easily; click on the tool you want to add, and then a wide range of default collections will appear. Please select your favorite one from the collection and drag it on your video.

Step 5: After completing the editing, you have to export your work to your desired location. Click on Export, now select your location and your format for the video. You can also manage the resolution of your video there. Click On Export, and it will take a few minutes to save your video.
Part 4. FAQs about How to Render Video in Premiere Pro
1. Why do we need to render video in Premiere Pro?
We need to render the video to overcome lag issues which causes your video to malfunction and get stuck on effects and transitions. First, you have to examine where your clip is malfunctioning, then select that area and render it to enjoy smooth playback.
The whole process of rendering the video is mentioned above in this article.
2. What does render do in Premiere Pro?
Render creates preview files on your disk behind your video to give you a smooth playback. Video rendering is how computers process data from a coding source and display the original video's information to fix your playback lag. During playback, you can see green, red, and yellow bars.
The yellow bar shows that this work area is unrendered, and the clip is highly affected by lag issues.
The red bar shows that this work area is unrendered.
The green bar shows that this work area is rendered, and there is an associated preview file of the original clip.
3. Do we need to render video in all video editors?
No, there is no such need to render your video to all editors. Many video editors automatically render your video and provide you with a smooth preview. In Adobe Premiere Pro, you may render your video if you have lag problems.
Many people report that Premiere Pro lags so much. It's just because of the high requirements of Premiere Pro. We recommend you use iMyFone Filme that renders your video automatically. You don't need to do it manually, and you will never get in trouble using it.
iMyFone Filme also contains many default editing tools, which makes your video more appealing. We can say that iMyFone Filme is the best editing application to make your videos more enchanting.
Conclusion
You can render your videos in Premiere Pro to process videos smoothly. We have discussed the step-by-step method to do that. But we have seen that Premiere Pro is slightly difficult to use for a beginner, and it may cause lag issues in adding effects. On the other hand, iMyFone Filme is an uncomplicated application that provides you with a smoothly running editing platform to edit your videos in a more engaging format. It is the most straightforward editing platform that beginners and advanced users can use. The best part is that it has everything that you need for video editing. Download Filme for free and have a look at its features and tools.


