


Adding text is necessary to make videos more engaging and self-explanatory. Adobe Premiere Pro is a popular video editing tool or software. But beginners find it a bit difficult to add text using the software and create animations. In this article, we will show you how to edit text in premiere pro and do the premiere text animation.
Premiere Pro is an excellent video editor, but I would recommend iMyFone Filme, Filme is more cheaper than Premiere Pro. And it has the best 4k HD support. Download iMyFone Filme below.
- Part 1. 3 Ways to Add Text in Adobe Premiere Pro
- Part 2. 5 Ways to Add Effects to Text in Premiere Pro
- Part 3. Center Text on Adobe Premiere Pro in 1 Minute
- Part 4. Add Scrolling Text in Adobe Premiere
- Part 5. Easiest Way to Add Text to a Video - iMyFone Filme

- Part 6. Essential Tips to Add Text to Videos
Part 1. 3 Ways to Add Text in Adobe Premiere Pro
Adobe Premiere Pro is a one-stop solution with easy-to-use unique features to create exciting titles and texts. Let's learn how to play with the text using this software;
1. How to Add Text in Premiere Pro
You can stick to the following steps to add text in Premiere Pro;
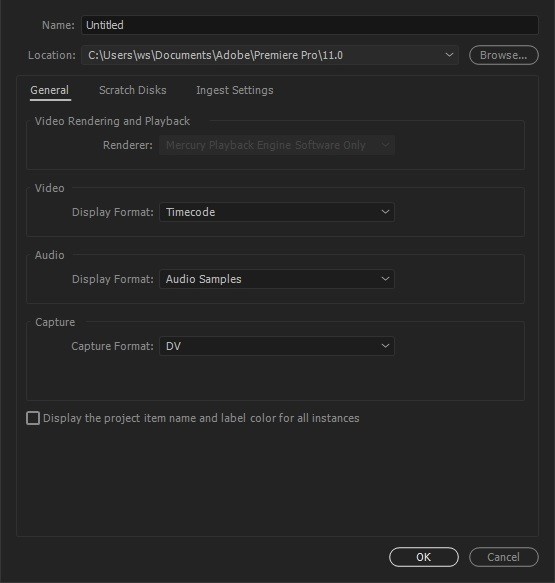
Download, Launch, and Open Premium Pro on your PC. Follow top > New > Project. Select a name for your Project. Import the video file and drag it to the timeline.
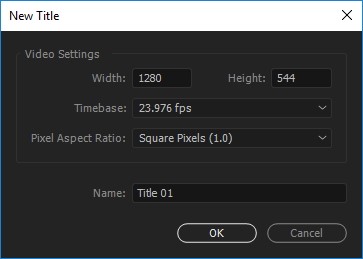
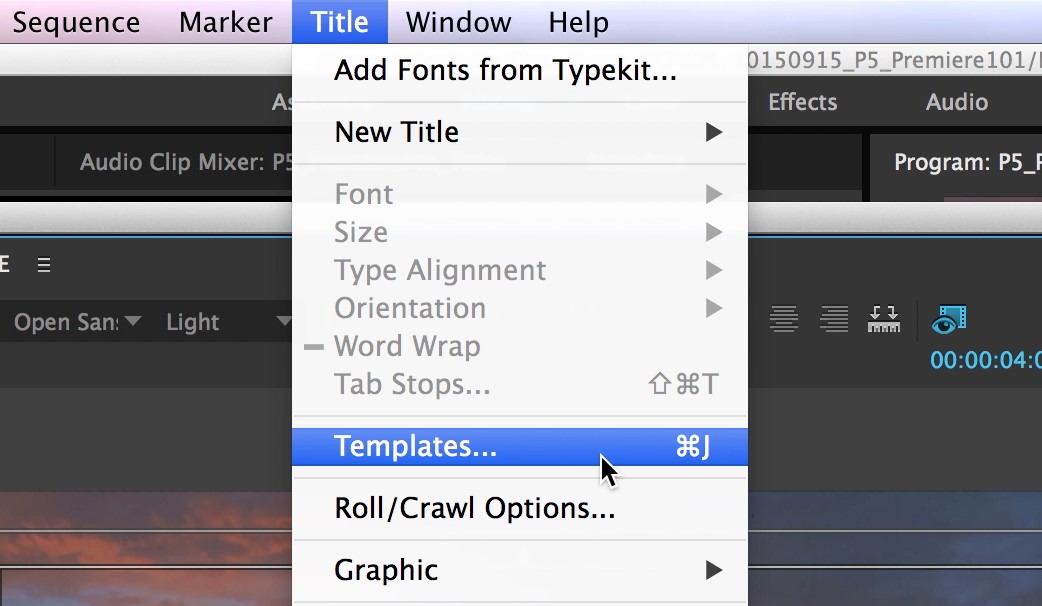
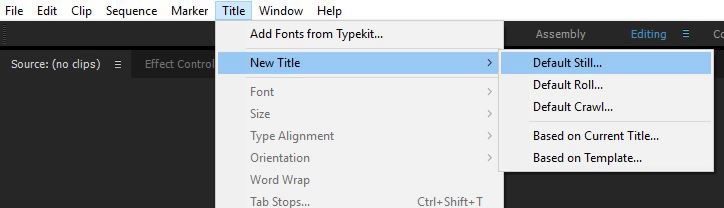
From the toolbar, select "Titles," followed by clicking New Title > Default Still. You can do this with a simple Ctrl+T key. Select other settings accordingly and hit "Ok."
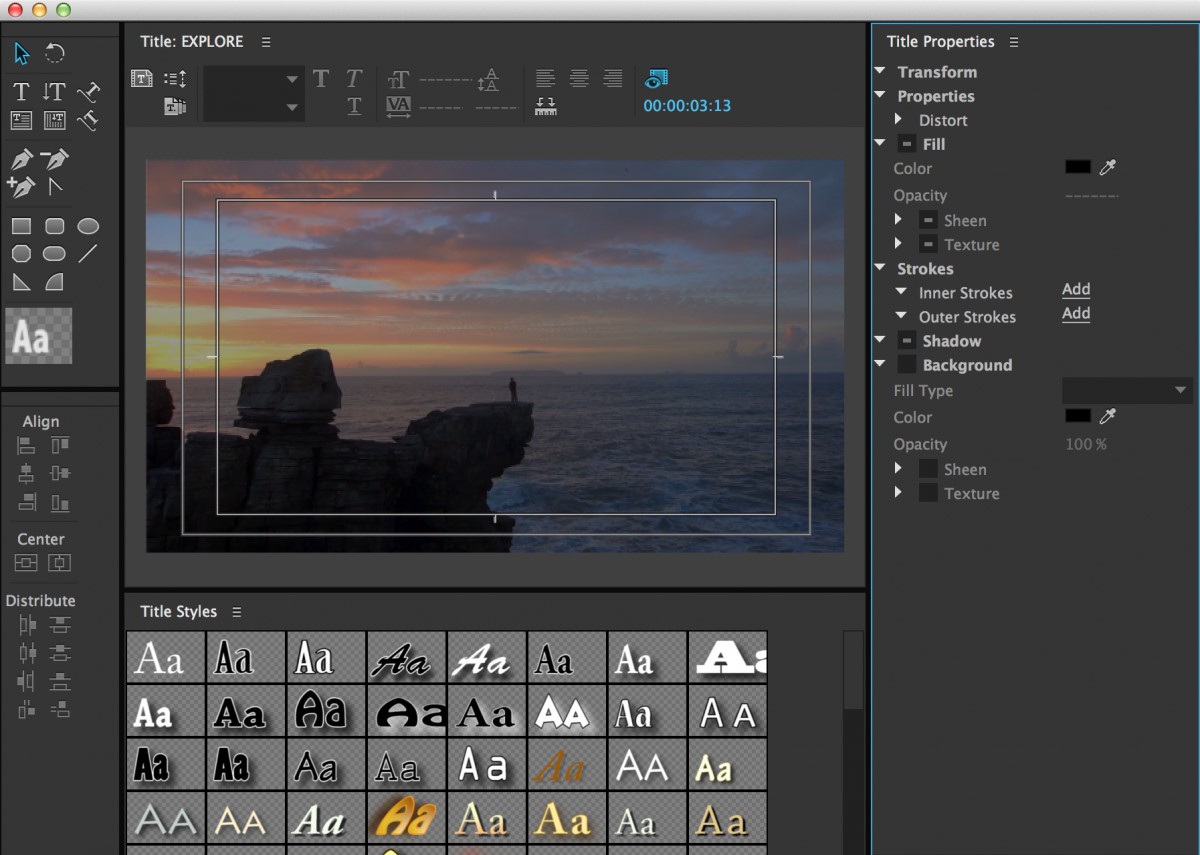
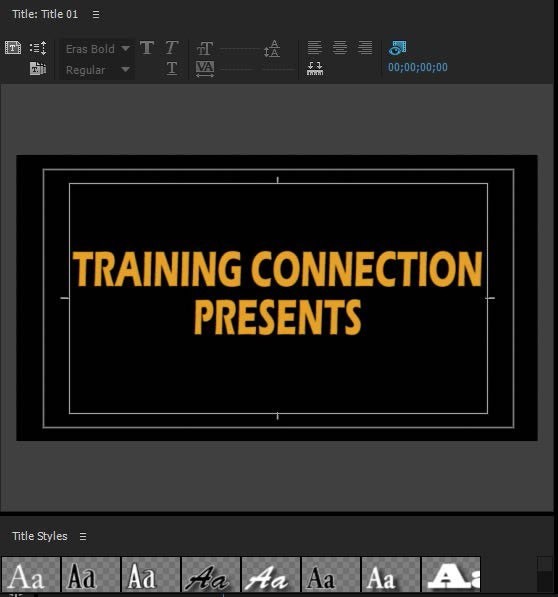
From here, the next window will show a wide range of title designs. Choose type color, spatial transformation, a type tool, and type alignment accordingly.
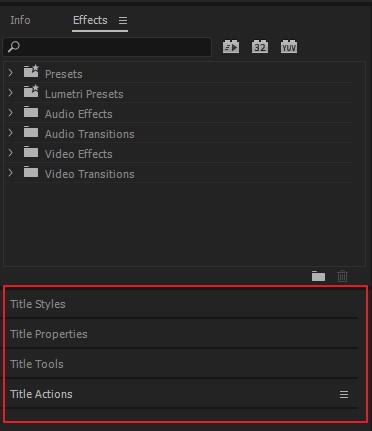
You can keep these titles perfectly in place by clicking on the assistive miniature monitor on your screen that previews the changes.
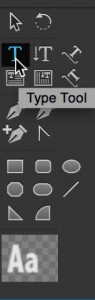
In this window, click "Type Tool" at the right and click on the area you want to add frame text. Use the type tool at the right and then click on the site you wish to add frame text.

Once you've added words, try to play with some settings like color, size, font style, and displacement, etc. Find your sweet spot and finalize the adjustments.
Text animation: Find and click "Effects Control Window" to add dramatic animation effects to your text. Using play-head, you can select the start and end of the Effect in the video. Later, click "Stopwatch" to apply the animation effect.
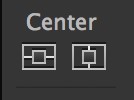
Next, try to align your text until perfect. For this, you can use the horizontal center and horizontal left movements and click the close button once you're satisfied.

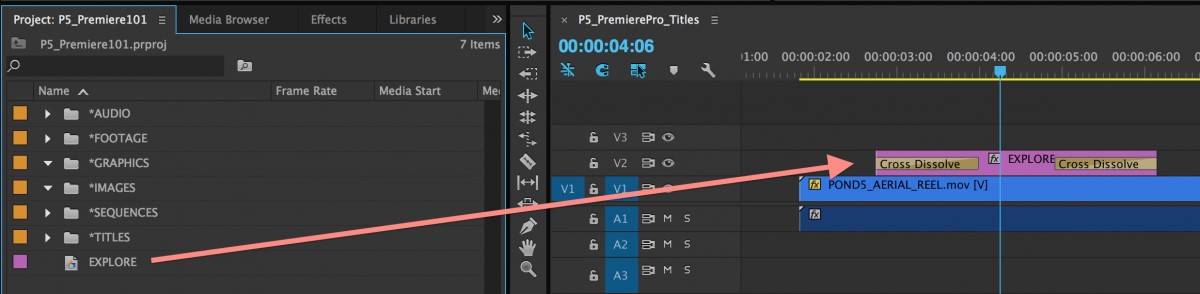
Here, the titles will show in the project panel. Just drag them on the timeline where you want to set them in a video. Preview all your edits. You can add more than one text overlay upon your wish. Once you're all done, click File > Export > Media to save or directly share your video on other social media.


You May Also Want to Know: Brighten Video in Adobe Premiere
2. How to Add Titles in Premiere Pro
Adding titles to a video using Premiere Pro is simple and convenient. Here's how;
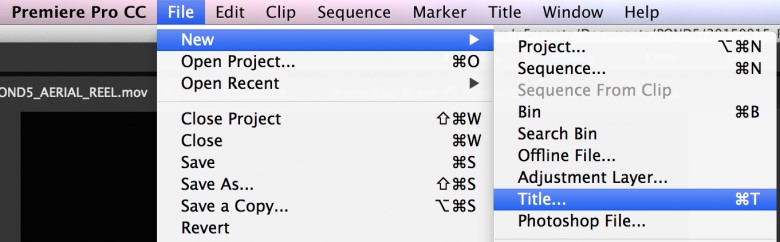
Create your title by clicking Choose File > New > Title. Give this title a name and click "Ok."
Click on the video where you want to add text. It will open up the "Title Tool Window" containing unlimited text, adding features to soothe your creativity.
Next, write your text by clicking the "Type" tool on the top left. Create a text box and write-in your Text. Use Arrows or "Center Action Tool" to rightly place your text.
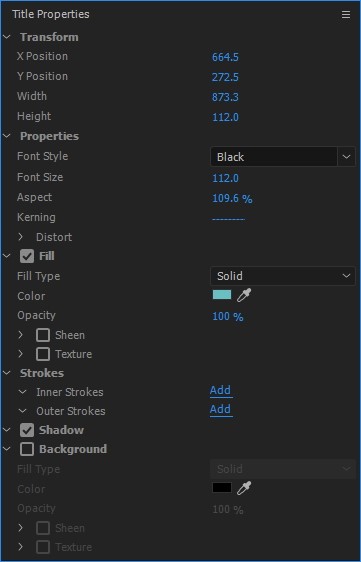
Once you've added the text, you can customize it just the way you want by clicking the "Properties" bar on the right side.
Once you have done all the customization, it will appear under the project window. Drag it to the timeline.
You can adjust the length of the text in a video and can also add effects and transitions. at this time. You can also save these titles as templates for later use.


3. How to Create Text Templates in Premiere Pro
Creating a text template is also easy and convenient using Premiere Pro following some simple steps stated as;
Open Premium Pro and click Title>New Title>Default Still.
Name your Title and add a new title using the "Title Editor."
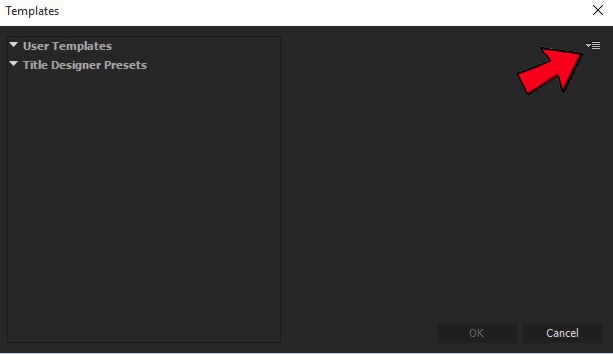
Click the "Template" icon and in the next video, click on "Menu Icon" in the top right.
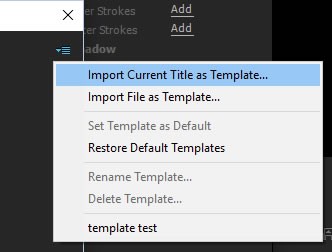
Now, choose "Import Current Title" as your template.
In the next window, save your template with a unique name and click "Ok," and it will be stored in "User Template Menu" for future use.


These steps may seem easy, and to some extent, they are, still, customizing and adjusting so many thick and thin details is quite challenging. It becomes more complicated when you use specialized and professional software like Adobe Premiere Pro.
Part 2. 5 Ways to Add Effects to Text in Premiere Pro
We can add effects to text in various ways. This will make your text more appealing, engaging, and visible. We are going to discuss five ways to add effects to your text. You need to follow some common steps to add any effect. Let's see those common steps first.
Step 1: Open Adobe Premiere Pro. Right-click on the project window at the bottom left corner. Click on Import. Now, you can select any video that you like to add.
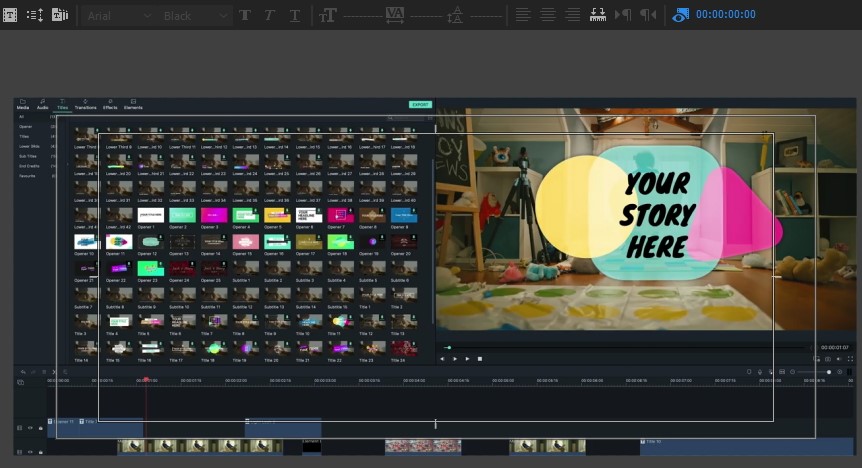
Step 2: Drag the video to the timeline and go to the Graphics tab. Click on the text tool and add text to the video.
After the above steps, you can use any of the following ways to add effects to the text.
1) Create Background to Text
You can make your text more visible by adding a background. The background could be of your choice, and you can edit it according to the video.

Step 3: You need to deselect if anything is selected. Click on the empty part of the timeline.
Step 4: Go to the Graphics menu> New Layer and click on Rectangle.
Step 5: You will see a rectangle on the canvas. You will also see a layer in the timeline. You can adjust the duration of the layer on the timeline.
Step 6: Adjust the position and size of the rectangle on the canvas. You can adjust it according to the size of the text.
Step 7: If your text is hidden under the background, drag the text layer in the timeline above the background layer.
Step 8: Select the graphics layer and go to the Effect Controls tab. You can select the desired color, opacity, and other settings for the background.
2) Text Pop Up Effect

Step 3: For creating the pop-up effect, we need to have the layer of each alphabet in the text. If the word is "Filme", then we need five layers for each alphabet. You only need to copy the text layer and make a total of five layers. Now, select one layer. Go to Effect Controls. Select the pen under Opacity. Now, you need to mask a letter. For example, mask the "F" of "Filme". Similarly, mask other alphabets in other layers. Finally, you will have five layers and only one alphabet in each.
Step 4: For popping the letters, the anchor point must be at the center. Select the layer of the first alphabet. In the Effect Controls, set the Anchor Point so that the alphabet is in the middle. Go to Scale and make it 0%. The text will disappear. Click on the clock on the left of Scale to create a keyframe. Move the playhead 4-5 frames to the right by using the arrow key. Make the scale 150%. Move the playhead 4-5 frames again and set the scale to 100%. This will create a popping effect on one alphabet. You need to copy and paste the settings layer to other layers. You can use Ctrl+C and Ctrl+V.
Step 5: You need to adjust the anchor points of the other letters as they are not in the middle. Adjust them so that all alphabets appear in the middle, one over the other.
Step 6: Finally, change the position of all alphabets and arrange them accordingly. You can now play the video, and your text will have the popping effect.
3) Add Text Bubbles
For adding text bubbles, you need a bubble image so that you can place text over it. You can search for the bubble image or create your own if you know how to do it.

Step 3: Import the bubble image from the project window. Drag it to the timeline. You can adjust the duration of the bubble.
Step 4: You can also adjust the position of the bubble and its size. You only need to drag corners in the canvas.
Step 5: After placing the bubble in the right place, move the text over the bubble. Adjust the text and bubble accordingly. Make sure the text layer is above the bubble image layer in the timeline.
Step 6: Your bubble text is ready. If you want to change the color of the bubble, select the layer in the timeline. Go to the Effect Controls tab and select the color and other settings.
4) Text Reveal Effect
Step 3: Deselect everything in the timeline by clicking on the empty timeline area. Go to the Graphics menu> New Layer and click on Rectangle. This will create a rectangle on the canvas. Make it like a thin line so that text could reveal from this position. Position the rectangle wherever you want.
Step 4: Select the text layer in the timeline. Adjust the position above the rectangle. In Text options, you will see a rectangle under Opacity. Click on the rectangle; it is a four point polygon mask. You will see a blue rectangle on the canvas. Adjust the rectangle according to the size of the text. You will notice that the text is only visible if it is inside the mask.
Step 5: Position the mask under the rectangle we have created. Go to the mask settings. Click on the Inverted button; this will invert the working of the mask, and the title will be visible if it is outside the mask.
Step 6: Go to Vector Motion in the Effect Controls. Adjust the vertical position of the text so that it could be over the mask and disappear. Click on the clock button on the left of the Position option to create a keyframe.
Step 7: Move the playhead to the position where you want your text to appear. Go to the Vector Motion again and set the vertical position of the text over the rectangle. The text will reveal when it comes out from the mask.
5) Make Text Slide

Step 3: Select the text in the timeline and go to the Effect Control tab. You will find the Text settings; expand it.
Step 4: Move the playhead from where you want to start the slide animation. After moving the playhead, set the position of the text in the Position option. You can select anything you like, and your text will be positioned accordingly. Click on the clock on the left of the position option. It will create a keyframe in the timeline.
Step 5: Move the playhead to where you want your animation to finish. Now, set the position of the text again. Once you set the position, the keyframe will be automatically created. Play the video, and you will see the text will slide from its first position to the second. You can add more keyframes if you like.
Part 3. Center Text on Adobe Premiere Pro in 1 Minute
If you want to align text on Adobe Premiere Pro, follow the given steps.
Step 1: Open the application. Right-click on the project window and click on Import. Select the video you want to import.
Step 2: Drag the video from the project window to the timeline.
Step 3: Go to the Graphics tab. Click on the Text tool and write the text. You can align the tool by using the select tool. But if you want more precision, select the text by clicking on it. In the Essential Graphics, you will see the alignment options under Align and Transform. You can align your text vertically and horizontally.
Step 4: Now, you can export the video.

Part 4. Add Scrolling Text in Adobe Premiere
Adding scrolling text in Adobe Premiere is quite simple. You can use this scrolling text for end titles or anywhere you like.
Step 1: Open Adobe Premiere on your PC. At the bottom left, you will have the project window. Right-click on the project window and click on Import. Choose the video file to add scrolling text to it.
Step 2: The video will appear in the project window. Drag it to the timeline.
Step 3: In the timeline, move the playhead to the position where you want to add the scrolling text. At the top, click on the Graphics tab/panel.
Step 4: You will see a toolbar on the right of the canvas. Click on the Text tool and click anywhere in the canvas to add text.
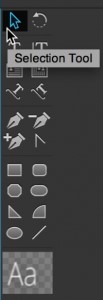
Step 5: Type whatever you want. For the positioning of the text, select the selection tool and move your text wherever you like.
Step 6: Click anywhere on the canvas to deselect the text. In the Essential Graphics panel on the right, you will see the Roll option. Check the Roll option.
Step 7: Your scrolling text is ready. If you want to change its speed, you can adjust its duration in the timeline by dragging the ends of the text. Now, you can export the file.
Also Read:
How to Speed Up Video in Premiere >>
How to Resize/Scale Video in Premiere >>

Part 5. Easiest Way to Add Text to a Video - iMyFone Filme
Although Adobe Premiere is a highly-professional platform but deep inside, we all want professional results without much time and effort. If you're also searching for a beginner-friendly video editor, iMyFone Filme, which takes the lead in the list of top video editing software, is going to be your love for video editing.
It can create all types of texts to embellish your videos, including Titles, Subtitles, End Subtitles, and Bottoms.
How to Use Filme to Add Text to Video
Let's see how magically Filme can do the things;
Download and launch the setup of iMyFone Filme on your PC.
Click "Import" to add a video file on the board and drag it to the timeline.
Edit the video by dragging it to the timeline of the Filme in the lower section. Check for any basic editing like cropping, scaling, etc.
To Add Text, click "T" to open the text style page. Choose the title that you want and click "+" to apply.
Tip: Another way to do this is to right-click on the text style and select "Apply."
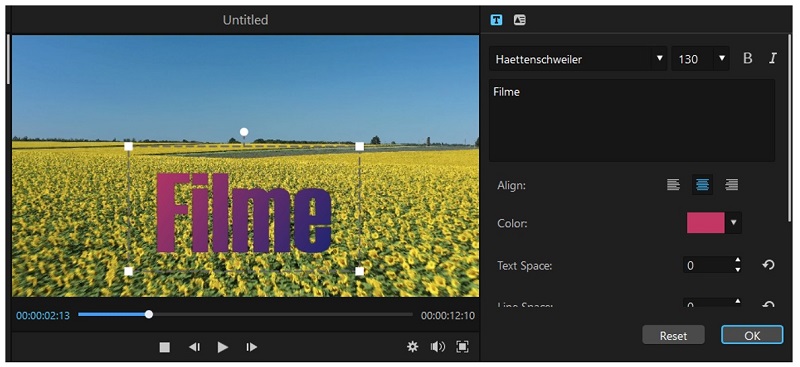
Double click on the text frame will open the text editing panel. Or, you can right-click the text effect, followed by selecting "Edit" to open that panel. There, you can choose from multiple options, including font, alignment, size, color, text space, opacity, line space, and position.
Once you're done with all the editing, save and "Export" your file to your PC.

And you're all set with your new video having all the text details you wanted for your video.
iMyFone Filme is a smart platform that allows beginners to taste professional-grade video editing but in the most effortless manner. Here are the main key features of iMyFone Filme that inspire and lure many users worldwide:
Key Features of iMyFone Filme:
Filme is an easy-to-use video editing software that is quite beginner-friendly yet professional, excluding any technical complexities.
The Fast Video Mode allows you to make videos quickly, saving you a lot of precious time.
You can enjoy a full blend of templates, special effects, and transitions to embellish your videos right just as you want.
You can rotate, crop, scale, resize, and split your videos in a fun way like never before.

At the end of the article, let me treat and please you with another helpful guide; some expert's tips regarding "Adding Text" to the videos. Read, and thank us later!
Part 6. Essential Tips to Add Text to Videos
Here are five considerable tips for you regarding the addition of text to the videos; have a look.
1. Size matters a lot
The text in a video should never be too small to read or too large to block the visuals. For better-adjusted text, create a mockup of your text and view it on different platforms to know how they look.
2. Readability of the Fonts
There are hundreds of styles and shapes of the fonts. Never go for a font that's tough to read as it may loosen the viewer's interest. It's also vital to consider Serif and San-Serif elements accordingly.
3. Obstruction/Backgrounds
Sometimes, obstructions are acceptable, but most of the time, the text should never be obstructing the screen or picture behind it. In simple words, the text should never block the video's visual content unless you want it intentionally.
4. Safe Margins
If you're making a video that might be viewed over different platforms, you need to set it in safe margins to enhance visibility and acceptance. Safe margin templates are mostly included in NLE's and keep your text safe from aberrations.
5. Overall Read Time
Apparently, a text in a video is a distractor of the visual content, and thus, the right balance is a must to avoid any distracting inconvenience. To maintain the balance, leave the text over your video for a sufficient time but not for a long time.
Also Read for Pros: Add text in Davinci Resolve >>
Final Words
We have explained how to add text in Adobe Premiere Pro. It can do a lot of video editing such as making professional slideshows. It is a bit difficult, but you can do it by following the exact steps we have discussed. We recommend Filme for beginners and quick editing. It will save you a lot of time, and you can easily add effects with one click. Moreover, there are tons of features in Filme, and you can do video editing without any experience.


