There are a particular set of users that use Screen Recording tools and even their work completely relies on them such as Gamers, tech or software reviewers, and even someone who makes tutorials. There are many Screen Recorders available in the market for Ubuntu users but not all of them match your set of requirements. Finding the best Ubuntu screen recorder that gives you the best quality and resolution is difficult. But we took the liberty and enlisted some best recorders for Ubuntu which might be helpful for you. If you are worried to the complexed record step, iMyFone Filme should be your top choice tool when screen record videos.
Hidden Feature of Ubuntu Screen Record
Have you previously heard about a built-in screen recorder for Ubuntu? Well, if not then you'll be glad to hear that there is an Ubuntu screen recorder that has already been incorporated into the system. It is GNOME Shell Desktop. It is a simple screen recorder and doesn't have any launcher app or any button to start or to exit out of it which makes it a hidden feature of Ubuntu. It is controlled by a bunch of shortcuts which we will tell you in a bit. Although this recorder doesn't support audio recording, it is still better than many recorders such as icecream screen recorder for Ubuntu for the quick screen recording session.
Steps to Record Screen on Ubuntu
Here the simple steps or we might say shortcut keys you can press to record the screen on Ubuntu:
Step 1. Start Screen RecordingTo, begin the screen recording on Ubuntu you will simply press a combination of keys together:
Ctrl+ Alt+ Shift+ R
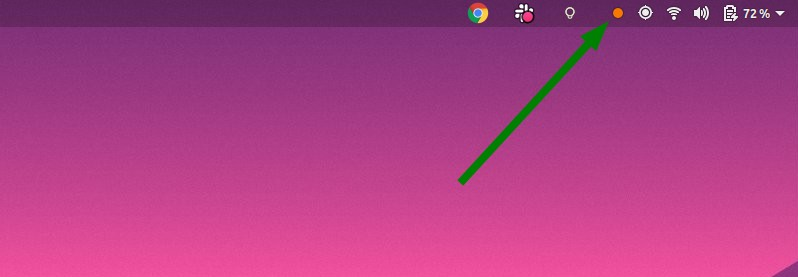
Your screen recording will begin instantly and you will be able to see a red-colored circular icon on the top right corner of the screen.
You can end the recording session any time you wish to. For that you will have to press together the same set of combination keys:
Ctrl+ Alt+ Shift+ R
Step 3. Change the DurationScreen recording usually stops automatically with this recorder after 30 seconds but you can surely increase or change the time duration quite easily by changing the terminal equation:
gsettings set org.gnome.settings-daemon.plugins.media-keys max-screencast-length 30
You can change the value of 30 to 60 for 1 min, 300 for 5 minutes, and so on. If you want unlimited time, you will replace 30 with 0.
Step 4. Save the RecordingOnce, you stop the screen recording, which you can at any time. Your recorded video will be saved in the WebM format to the Video folder.
5 Best Ubuntu Screen Recorders for Every User
Now, as we already told you the above given built-in recorder possesses limited features and doesn't even record the audio. So, we thought of compiling a list of the 5 best recorders which will assist Ubuntu record screen video and audio. We will also introduce key features of each which will help you decide better.
1. SimpleScreenRecorder
The first recorder on our list is SimpleScreenRecorder. As the name clearly indicates, it is a simple yet effective tool to capture and record the screen in Ubuntu.
Features
-
Clean and easy to use UI
-
QT based recorder
-
Simple recorder with a single menu containing all the options
-
Allows you to save Multiple profiles, helpful if you screen record with various settings
-
Synchronization between audio and video is commendable
-
Live preview option available
-
Records entire screen or even a part of the screen
-
Supports external audio via a microphone
To know how to use Simple Screen Recorder in Ubuntu, watch the video tutorial:
2. Kazam
Next on our list is Kazam which is another powerful yet simple screen recorder, which is perfect for beginners. It also supports audio feature optionally with the supported input device.
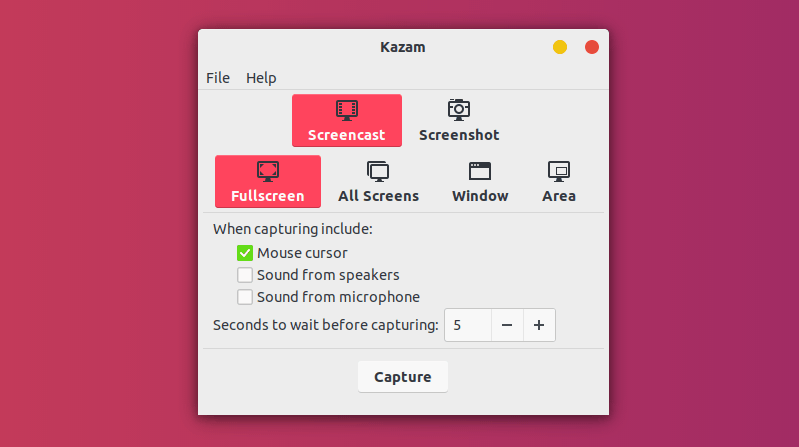
Features
-
Clean and compact UI
-
Minimal features which make it user friendly for beginners and make the process faster
-
Supports multiple video output formats
-
Records an entire window or selected region of the screen
-
Supports taking screenshots
-
Enables to add text on the recording
-
Allows sharing video directly to YouTube
3. Open Broadcaster Software OBS
OBS is a free and cross-platform screen recording software and is well suited for Windows, Mac OS, and of course Linux. Among the open source software supporting for Linux, OBS is mainly for professional users who need to screen record, stream videos and tutorials. It is an all-in-one software if you are looking for a feature rich and advanced screencasting tool.
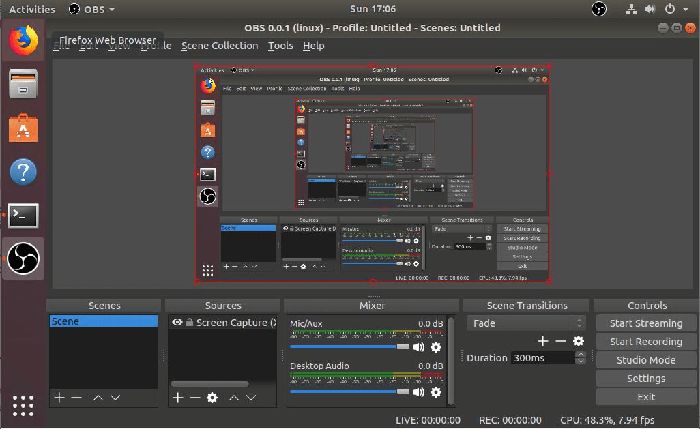
Features
-
OBS has an interactive and clean interface
-
The tool possesses all features you would need in a Screen recorder including filters, audio mixers, etc
-
It allows live streaming
-
OBS uses H264 and AAC to support encoding
-
Supports webcam during screen recording
-
Efficient and well-built configuration
-
Output formats for recorded video is in FLV and MP4
-
Hidden tweaks in the tool make your experience worth it
4. RecordMyDesktop
It is a lightweight and efficient tool that is written in C. The tool offers two separate and clean GUI that primarily focuses on GTK & QT4. It is easy to understand doesn't require you to read manuals to understand it's working.
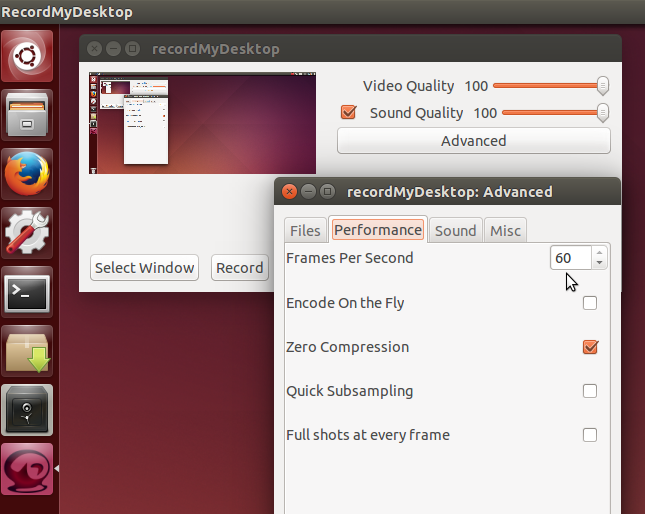
Features
-
Minimal and clean interface which is easy to run
-
Recording can easily be initiated using simple command recordmydesktop
-
The tool allows you to choose the audio and video quality but options are limited
-
It allows you to record videos in high resolution and high-definition quality
-
This software allows you to tweak the output of the video
-
The tool here supports screen recording of a single window
-
It works well with the latest Ubuntu update
5. VokoscreenNG
Last but surely not the least on our list is VokoscreenNG which came next in line to VokoScreen. In VokoscreenNG 'NG' indicates New generation. It is sleek and offers multiple formats for both audio and video. It is simple in its usage therefore can be used on regular basis.
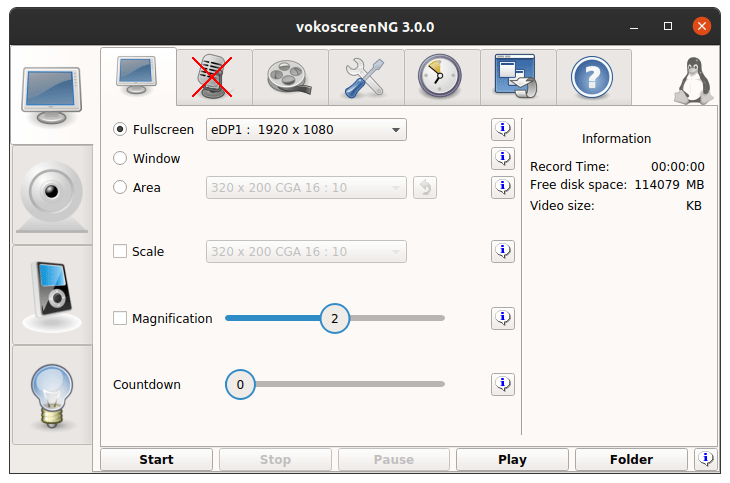
Features
-
User-friendly software with granular controls
-
The tool is easy to use with a bunch of useful and advanced features
-
It supports the screen recording of the entire screen as well as a particular area of the screen
-
The recorder supports using a webcam during recording
-
You can even set a timer for recording
Best Alternative for Windows & Mac: All-in-one Screen Recorder and Editor
iMyFone Filme
We have already discussed in detail about the various Ubuntu screen recorder tools. Now in this part of the article, we will introduce you to what we know is the best alternative screen recorder for Windows and Mac OS users available in the market. Yes, you've guessed it right! It is none other than iMyFone Filme Video Editor. Filme is one of the leading best free recorders, for it is well designed with an intuitive interface which makes it user-friendly and the ultimate choice for screen recording and even editing videos. iMyFone Filme gives the videos a crisper and more professional look with its amazing tools and features. The program enables the users to have a one-month of free trial so they can experience the rich features which you surely won't be able to resist.
Features
-
Filme is the software that is compatible with Windows, Mac, and other iOS devices making it the best alternative screen recorder
-
The software enables immediate editing of the recorded videos
-
With tools like trim, cut, rotate, zoom in you can surely enhance the video quality and appearance
-
With more than 20 instant modes, it gives you the freedom to choose the themes for your videos
-
It has more than 110 transitions, effects, filters, and animations to give aesthetic look to your videos
-
You can add text and titles in your favorite fonts and the colors of your choice
Steps to Record Your Screen Using iMyFone Filme
Here are some simple steps you can follow to record your screen using iMyFone Filme on your Windows and Mac:
Step 1. Screen adjustment & RecordingIn this step, you will screen record your desktop in three simple steps. From there, we will move forward:
- Launch iMyFone Filme software you just installed on your PC and click on the record screen button.
- Now, you will set and adjust the part of the screen you want to record. Adjust the size according to your requirement.
- After you have done the settings, click on the red record button in corner of the screen to begin recording.
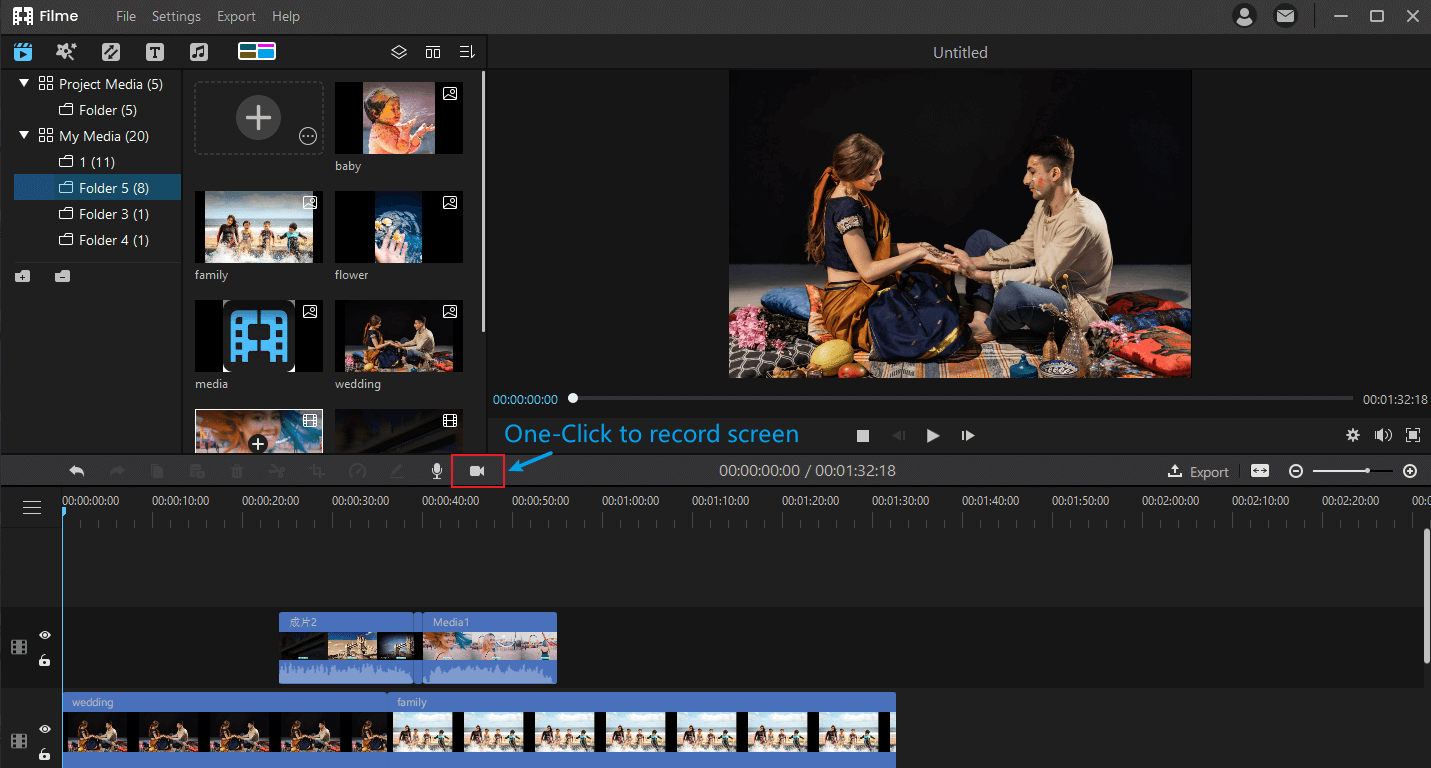
Once the recording is done click on the same red-colored button to end it. Now recorded video will appear in the Media importing Section.
Step 3. Edit the videoNow, for further editing and enhancement of the recorded video, you can crop, cut, add filters, music, transitions, and much more.
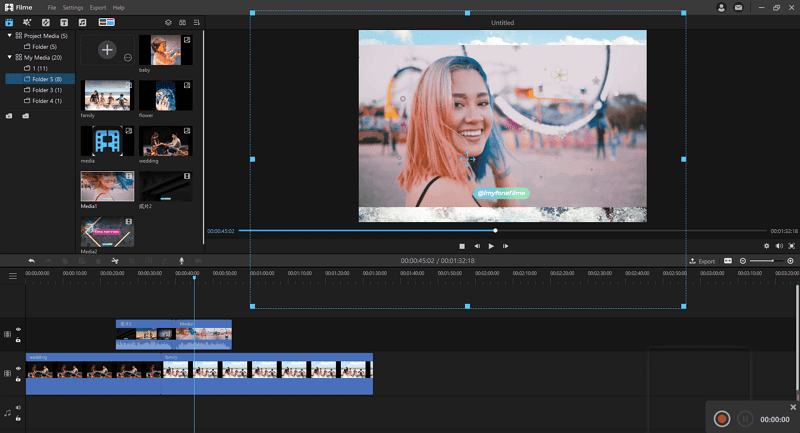
In the last step, you can preview the editing and changes you made to the video. You can undo the changes if you didn't like them. Now, you can export and even share the video to social media.
Conclusion
There are innumerable screen recorder tools available for Ubuntu but, here we have picked up the ones that we consider to be useful and that can bring out the best output quality. We have also mentioned their major key features which will help you decide Ubuntu screen recorder for you. Lastly, a bonus alternative is iMyFone Filme, one of the best all-in-one screen recorders and editors for Windows and Mac OS you must check out.
iMyFone Filme
Record Your Screen with Simple 3 Clicks
Download Now