Sometimes we need to blur objects, faces, logos, and other things in videos. It is an integral part of the editing process as it protects privacy. You might need to blur an address, registration number, the face of the person who is not willing to be on camera, or anything else.
If you are wondering how to blur a video, you are in the right place. We will tell you the step-by-step method of using different tools and how to blur videos and certain parts with perfection. Let's begin.
Part 1: How to Blur a Video on Windows PC?
One of the best video editors for Windows is iMyFone Filme, which is a beginner-friendly yet advanced video editor that can take your editing skills to the next level. The most important thing about Filme is that it does not need any prerequisite knowledge or experience of video editing; the interface is straightforward so that a beginner can use it without any hassle.
You can use Filme to blur videos, and you can do it in two ways. It allows you to either blur the whole video or certain parts. You can choose anyone you require. Let's have a look at both of them one by one.
Way 1: Blur an Entire Video
You can blur the entire video using Filme, and it is just a matter of one click. Therefore, you can save time and do the job without any hassle.
Step 1: Open Filme on Windows or macOS. The installation process is pretty simple. After installation, open it.
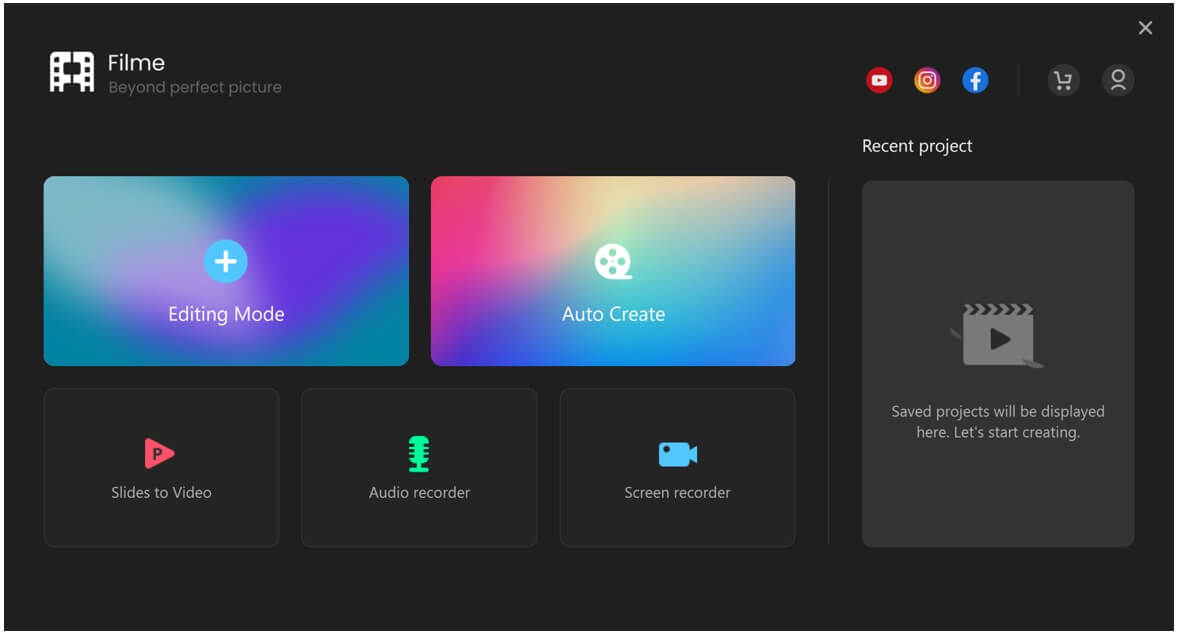
Step 2: We have told you Filme is a versatile tool. You will see various options after opening it. You need to click on Editing Mode.
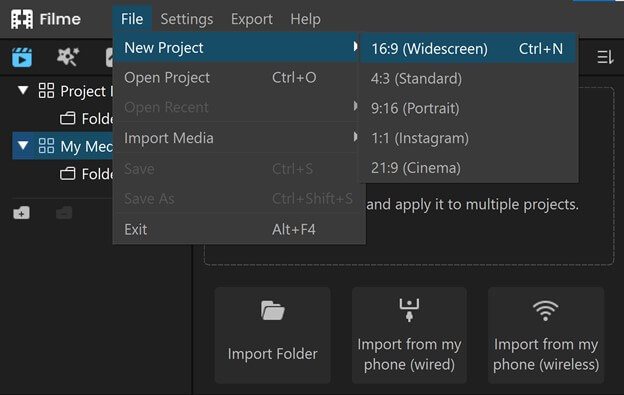
Step 3: Now, you will be in the video editor. Go to File>New Project and select a suitable aspect ratio for your project.
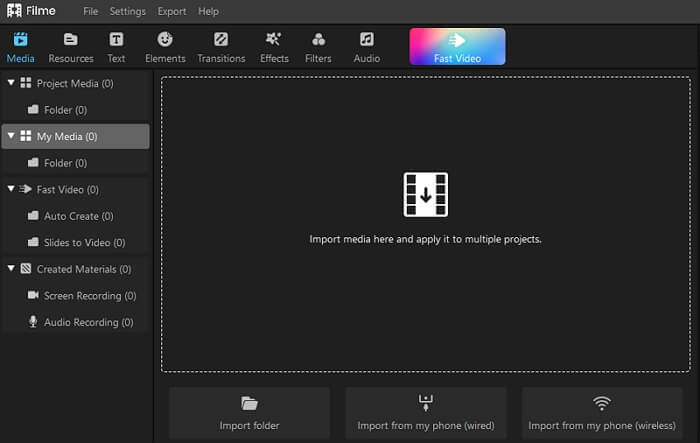
Step 4: Go to the Media menu. Click to import your video from your computer. Drag the video to the timeline.
Step 5: For making your video blurry, go to the Effects tab (at the top left corner). You will have dozens of effects. Find the blur filter and click on it. It will be applied to the video.
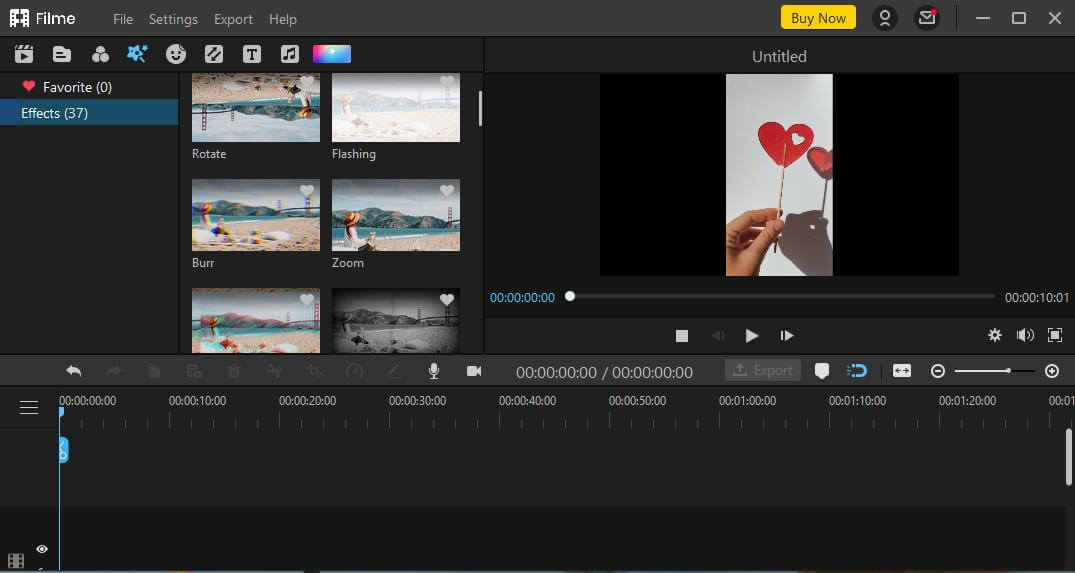
Step 6: Now, you can make other edits if you want. You can add music, stickers, effects, text, or anything you like. By using the tools above the timeline, you can crop, trim, split, adjust speed, change contrast/brightness/color, and make various other changes to your video.
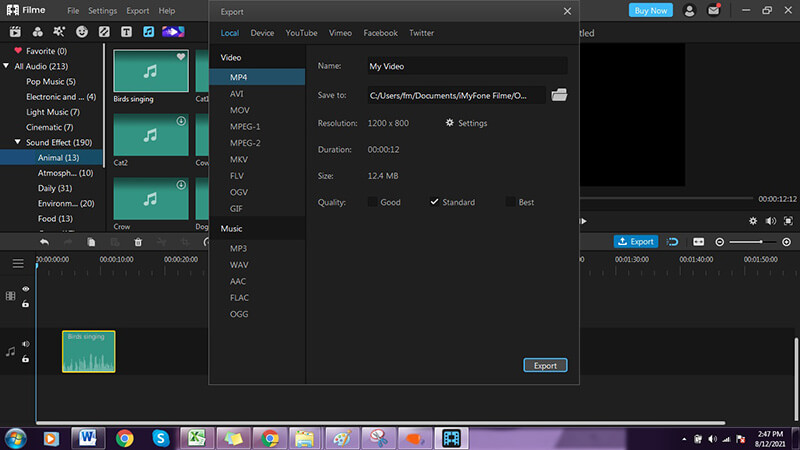
Step 7: Finally, click on the Export button. Select the desired settings for the final video. Click on Export.
Way 2: Blur a Part of a Video
You can also blur a part of the video if you don't want to blur the entire video. It is helpful if you want to blur a logo, face, or anything else in the video. Some steps are the same as the previous way; only the blur step is different, so we will keep the other steps concise.
Step 1: Open Filme and click on Editing Mode.

Step 2: In the Media menu, click and import the video. Drag the video to the timeline.
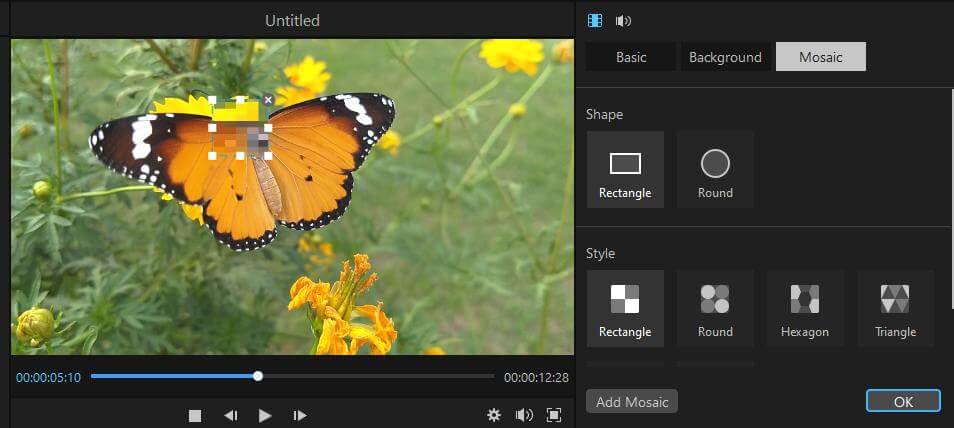
Step 3: Find the Edit option in the toolbar. Click on it. Then click the Mosaic option on the right. You will see shape and style of blurring on the screen. You can select the area that you want to blur in the video. Adjust the rectangle by dragging. Drag its edges to adjust its size. You can also set the hardness of the blur effect.
Step 4: Click on the Export button. Export the video according to the format and other settings you need.
Other Features of iMyFone Filme:
In Filme, you can do almost any type of edit to your videos. From the basic to advanced, it has got every tool you need. You can trim, split, crop, change speed, adjust color, and make other changes in no time. It has a vast library for effects, transitions, text, sound effects, filters, music, and stickers, so you just need to pick whatever you need.
The major benefit of using Filme is that it is a versatile tool. It has a voice changer, PPT to video converter, video resizer, video converter, slideshow maker, screen recorder, audio editor, and many other tools. It is an all-in-one video editor for your multiple needs.
Part 2: How to Blur a Video on Mac?
If you use a Mac, then iMovie can be your first choice as it is a free video editor that can be used to make necessary edits to videos.
Unfortunately, there is no blur effect in iMovie, so you cannot apply it with one click. You need to do some extra steps to make your video blur. It might sound a bit complicated, but you will find it simple and quick once you learn it.
Steps to Blur a Video Using iMovie (Mac)
Step 1: Open iMovie on your Mac.
Step 2: After entering the video editor, you need to import the files. You can do it from the File menu, but the best way is to drag the files to the timeline. Drag the video to the timeline and then drag the pixelated/blur image.
Step 3: It is necessary to keep the pixelated image above the video in the timeline. Otherwise, you won't see it. Select the image on the timeline. You will see a toolbar above the video. You will see the Cutaway option there. Click on its down arrow and select picture-in-picture.
Step 4: After selecting it, you will see the dissolve option. It is set as 0.5 by default. You need to change it to 0.

Step 5: You will see borders around your pixelated image. You can drag its corners to adjust the size according to the object you want to hide. Drag it and position it over the object.
Step 6: You can control the duration and appearance of the image in the timeline. If the object is moving in the video, you can use keyframing. You will see it on the top left of the canvas. Move frame by frame and adjust the position and size of the rectangle.
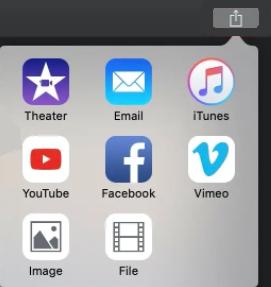
Step 7: Finally, tap on the Share button at the top right corner of the window. Click on File and select the video resolution and quality. Click on Next. Select the folder and enter the name of the file. Click on Save. iMovie will take some time to render the video, and after that, it will be saved to the desired location.
Part 3: How to Blur a Video Online
There are only a few online video editors you can trust, and one of them is Kapwing.
Steps to Blur a Video Using Kapwing
Step 1: Open your browser and go to Kapwing online video editor by following this link. Click on Start Editing.
Step 2: Now, you will be in the video editor. The first step is to upload the video. On the left, you will see the Media tab. It will be opened by default. Click on the Add Media button. Select the video from your computer. It will take a few minutes to upload the video.
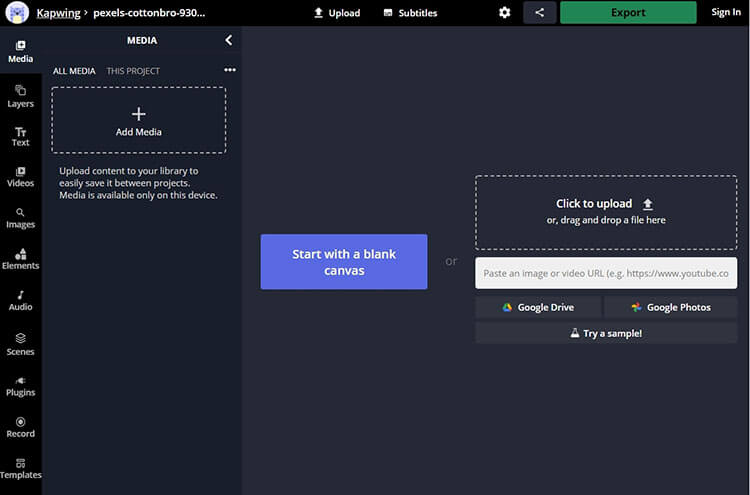
Step 3: After uploading the video, tap on the "+" button over it to add it to the timeline. Now, you are ready to edit the video.
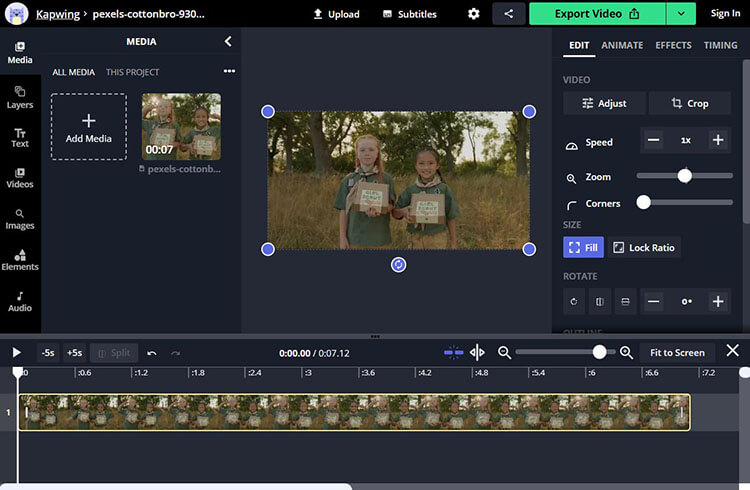
Step 4: Click on the video to select it. If it is already selected, there is no need for a click. On the right, you see the Edit tab. Click on Adjust.
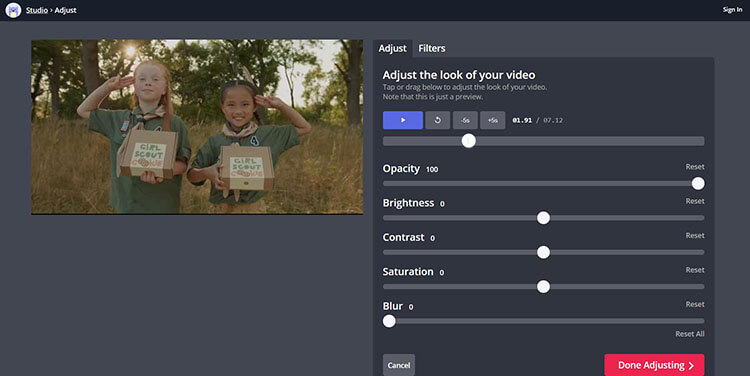
Step 5: It will open the Adjust panel, and there will be various adjustments, such as opacity, brightness, contrast, saturation, and blur. You just need to set the blur according to your needs. After adjustments, click on Done Adjusting. This action will make the whole video blur.
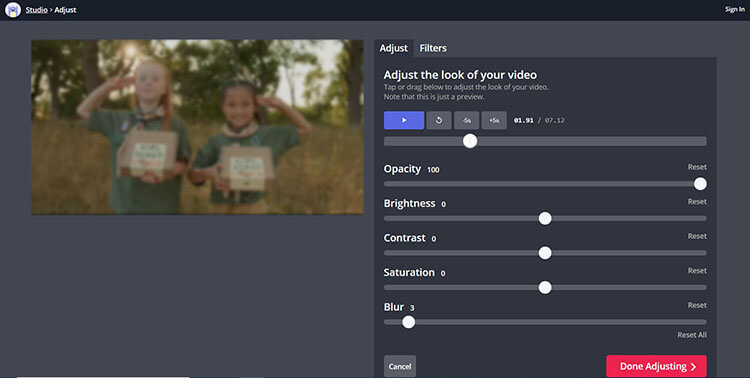
Step 6: You will be back to the video editor again. Now, you can make other changes. You can add text, images, audio, filters, elements, or anything you like. You can trim, adjust speed, crop, adjust the size, add animations, and make other changes.
Step 7: When you are ready, check the preview. Finally, click on the Export button. You can select the file containers. It will take a few minutes to render the file, and then you can download it.
Part 4: How to Blur a Video Using Video Blur Apps
4.1 Video Mosaic (For iOS)
Video Mosaic is a special application to create blur effects in videos. You can either record a video or use one from the album and create a stunning blur effect within a few taps. You can select the area you want to blur using its tools and adjust the strength and thickness. It is a perfect application for quick results.
Steps to Blur a Video Using Video Mosaic
Step 1: Open the App Store. Search for the app, download it, and open it on your device. You will see two options on the home screen. The camera button is to record a video, while the other button is to upload a video from the album. You can choose whatever you want.
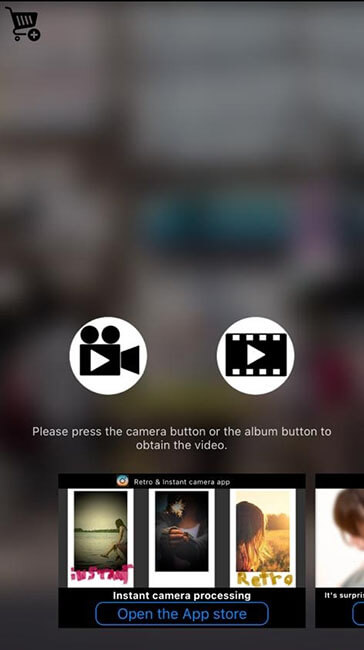
Step 2: After uploading the video, you will see different options and settings to add a blur effect. For selecting the area, you can choose finger, face, shape, and other options. The easiest one is Finger; tap on it.
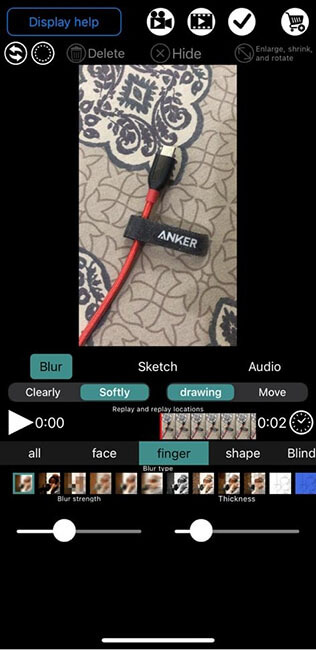
Step 3: Move your finger to the area that you want to blur. If you have selected a shape, select the area using it. You can blur a face, watermark, logo, or anything else. At the bottom of the screen, you will see two bars. You can adjust the blur strength and thickness by using them.
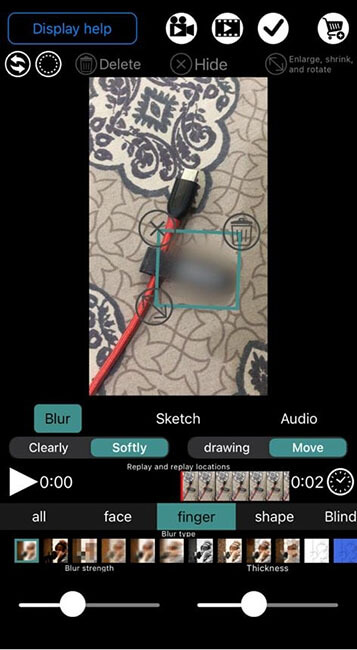
Step 4: When you are done, tap on the tick mark at the top right corner. The app will take a few seconds to process the videos, and the final file will be saved to your device.
4.2 Point Blur (For Android)
Point Blur is an Android app for blur effects in images. You just need to upload the image and move your finger over the image to apply the blur effect. It is pretty simple, and it has settings, such as intensity and size, to make the final image more than perfect.
Steps to Blur a Video Using Point Blur
Step 1: Go to the Play Store and search for the app. Download the app and open it.
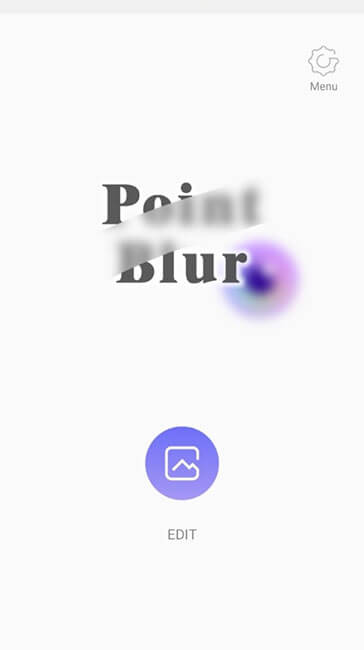
Step 2: You will see the Edit button on the screen. Tap on it. You will be in the Gallery; select the image you want to edit.
Step 3: After uploading the image, you will see three options at the bottom. You can crop the image if you want. If you want to crop, click on Crop and select the desired area. Otherwise, click on Full.

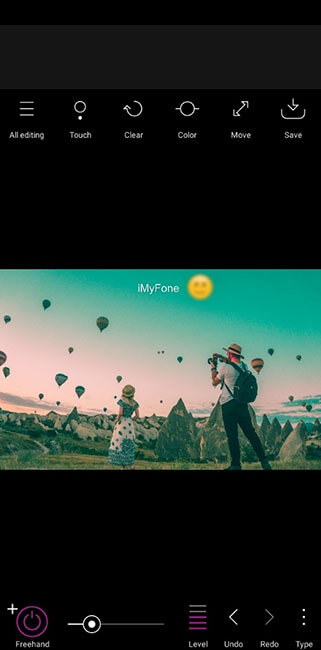
Step 4: You will be in the image editor. With the help of your finger, you can blur any object or area you want. You can also set contrast, hue, brightness, and saturation.
Step 5: After all, tap on the Save button on the top right corner of the screen.
Also Read:
How to Blur Faces in a Video on iPhone/Android
Frequently Asked Questions
1. How do I blur someone's face in a video?
If you want to blur someone's face, you can use Filme. For this purpose, you need to use a special tool that blurs only a certain part. Other than Filme, you can use iMovie and place a pixelated image over the face. Video Mosaic can also do the job, and it would be the easiest option, but if the object is moving, use a desktop tool.
2. How do you blur a picture in a video?
If there is a picture in a video, you can make it blur, similar to other objects in the video. You can either use a blur tool that can blur a certain part of the video or place a blurred image over it.
3. How do you blur a logo in a video?
For applying the blur effect on a logo, it is better to place a blurred image over it. You can do it in Filme or iMovie. Import the image and place it above the video on the timeline. Video Mosaic is also a good option, and you can blur the logo as much as you want.
Conclusion
Applying the blur effect on the entire video or certain parts of the video is not complicated. You can do it on your own using the tools we have discussed. We have discussed an online tool, mobile apps, and desktop tools.
Online and mobile tools are suitable for non-professional use when you do not care about perfection. But if you want your videos to be extraordinary, you should use a desktop video editor like Filme to blur your video. Filme is an exceptional video editor that anyone can use. Along with applying the blur effect, you can make other changes to the video to make it stand out from the crowd.


